Avoiding The Loudness Penalty

The loudness penalty can result in your carefully mixed and mastered track being reduced in volume by streaming services. In this post we’ll explain why this happens and how to avoid it.
Loudness used to be simpler to navigate
Applying the advice you’ll find online for the optimum target levels for the final mix or master of your tracks can sometimes seem like trying to navigate a minefield.
Not so long ago, when CD was the playback format favoured by the vast majority of music lovers across the planet, things were far more straightforward, as there was a single, universally understood output level acting as a ‘digital ceiling’. These days, we tend to enjoy most of our music on Spotify, Apple Music, Tidal, YouTube and other online platforms, for which the advice is less definitive. And with artists releasing their music online as well as on physical formats including vinyl and CD, any sense of a ‘one size fits all’ standard is a distant memory.
Loudness differences in playlists
Central to the difference between listening to music on physical formats versus online is the contrast between an album of one artist’s work and a playlist, which is likely to jump between artists and even musical genres.
If you buy a single artist’s music on a physical format, you’re buying a self-contained body of work with the next track on the album following on seamlessly from the previous one, with songwriters and mix/mastering engineers able to make choices based across an entire album’s flow.
This is very different to a Spotify playlist, for example, which is likely to contain music from a range of different artists (and their associated teams of producers and engineers). Left unchecked, this might mean a huge range of dynamics between the tracks on a playlist, as no production team is responsible for managing it from one track to the next.
So you might find that your track gets boosted or cut without you knowing about it. This handy loudness penalty tool can show you what the impact of that might be on your tracks.
Streaming services and volume standards
To get around the need for listeners to constantly reach for their volume dials to boost or cut levels as a playlist unfolds, streaming services employ a volume standardisation protocol to ensure that tracks never become too loud or too quiet. And that protocol will step in to enforce an evenness of volume if it encounters a track whose average volume breaches the platform’s needs.
In other words, if you upload a mixed or mastered track which is considerably quieter than other music on any streaming service, that platform will boost the perceived volume level of your music to compensate for it being quieter.
But if your mastered mix has a louder perceived volume than the streaming service’s default, it will bring its volume down to compensate.
This is called the Loudness Penalty and it’s well worth avoiding.
Why you need to avoid the loudness penalty
Well, for starters, you want to be responsible for the output level of your music, rather than hoping that a software algorithm will take care of levels for you. More importantly, however, you don’t want to compromise on the dynamics of your mix (the volume range between the quietest and loudest moments), which is likely to happen if your mix levels are penalised.
So the important question arises – how do you avoid the Loudness Penalty?
How to avoid the loudness penalty
To understand this, you first need to understand what LUFS is (check out our earlier blog post on LUFS). LUFS is key to how streaming services measure volume – and bear in mind that each service measures to a slightly different output level.
The crucial measure for avoiding the Loudness Penalty is called Integrated LUFS.
This is a measure of the perceived loudness of a track from start to finish.
It is measured against the default LUFS level for any streaming service and, either the boost or cut explained above is automatically created as these two values match up.
If the default LUFS setting for a streaming service is -14dB LUFS, your track will be boosted in volume if its loudest perceived volume falls short of this and penalised in volume if it exceeds it.
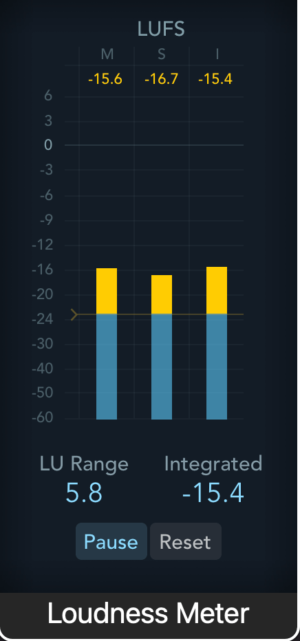
Know your Integrated LUFS level
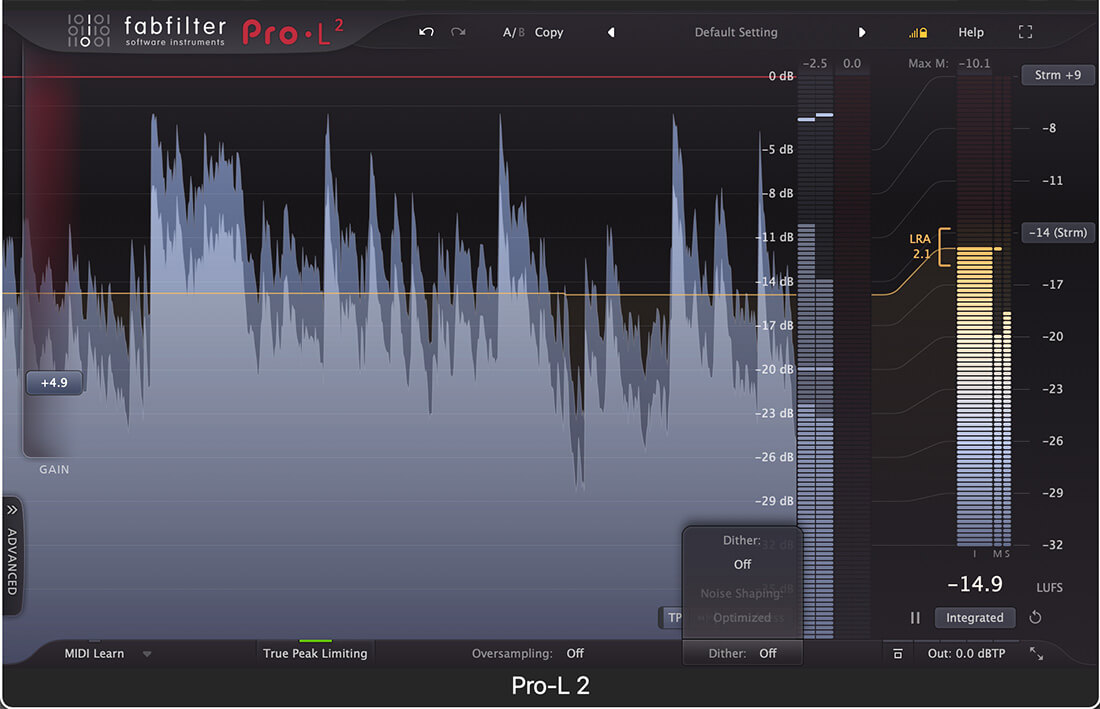
To avoid the volume of your track being penalised, you firstly need to know its Integrated LUFS level. The most effective way of doing this is to put a level meter at the very end of the output channel of your track and, as your stereo output buss chain develops, monitor how levels are building up as you apply processing. Either that, or use the Loudness Metering available onboard your Limiter plug-in, like this one in FabFilter’s Pro-L 2.
Meter at the end of the output chain
Remember, however you meter output levels will need to come at the end of your chain; there’s no point putting it first and then adding volume via a Brickwall Limiter later, as the meter won’t be showing you the ‘true’ level.
Measure start to finish
To measure Integrated LUFS, there may well be a ‘start’ or ‘reset’ button within the meter which, periodically, you should press. Otherwise, the LUFS level will be calculated throughout your session, potentially including all of the time you spend with the drums solo’d or while you work on vocal automation.
Remember, it won’t be a true measure of the output level until you reset the level and play through your whole track from start to finish.
And this is the crucial point for avoiding the loudness penalty – a true understanding of perceived average volume level alongside understanding that Integrated LUFS measures everything from the first moment of your track until the last.
If your track starts loud, stays loud and ends loud, it is far more likely that its average volume will need to come down as you apply output processing, or suffer at the hands of the loudness penalty once it’s uploaded, than if your track is more dynamic.
Buy volume below the threshold
Remember that each moment your track falls below the streaming service’s LUFS output threshold, the more you’re ‘buying’ volume for the louder moments.
It’s been observed that part of the reason Billie Eilish’s music sounds so good on streaming services is because her tracks often start quietly, with a delicate arrangement, whispered vocals and other techniques to keep levels low.
This means that when the choruses land, they pack a punch as they can be louder, for all of that extra level the mixes have saved up.
Key tips for avoiding the loudness penalty
So, key tips for avoiding the loudness penalty are to make sure there are sections of your track which offer real volume contrast to the loudest moments and avoiding slamming your mixes with dynamics-controlling plug-ins (like too much Compression and excessive Limiting).
Also, keep a close eye on your mixes and masters’ loudness levels as your track nears completion, applying Gain offsets, volume automation reduction, or other techniques to bring overall output level into the desired range.
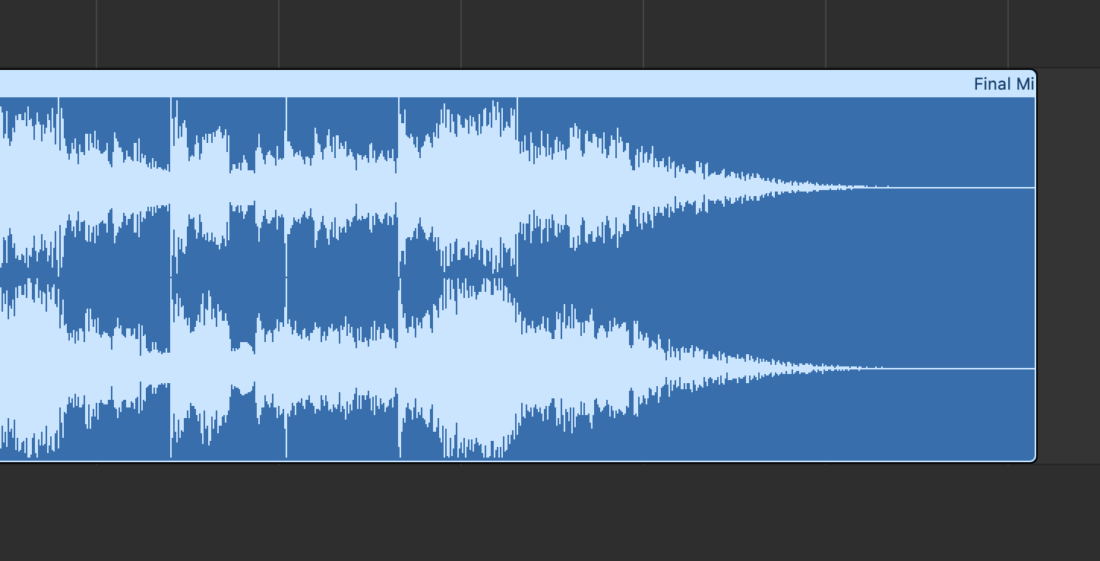
Remember too that an Integrated LUFS level includes a track’s fade out – a useful way to gain a little extra volume for other sections of your track.
Check the LUFS requirements for each platform you’re uploading to and, if necessary, print assorted mixes of your tracks which meet those needs.