How to use Valhalla reverb
The reverb plugin which shows up repeatedly in the studios of our FaderPro artists and educators is Valhalla’s VintageVerb. Why this Valhalla reverb? And, if it’s so good, how should we use it? Well, we’ll get to that. But before we do…
Reverb – it’s all about the space, man
You’re likely to know that one of the most essential considerations when recording and mixing music is ‘space’. The reverbs we choose to add, curate, design and shape for our productions are a huge part of the auditory experience of listening to music. And when you think about it, so they should be.
If you go to a concert of classical music, the orchestra sounds very different if you’re sitting in Row A compared to a seat in Row Z. This is because the further away from the source sound you are, the more the acoustic properties of the concert hall come into play and, therefore, the more ‘reverberant’ that sound will be. This is even more true in extremely reverberant spaces like cathedrals.
If you want an example more in line with modern pop and rock techniques, fire up any drum library which allows you to experiment with balances between spot microphones on each drum alongside those for overheads and room microphones. The entire experience of the drum kit will change as you add in the ambience of the room.
Keep it dry. For now, anyway
Modern recording practices suggest that there are huge benefits to recording sounds in essentially dry recording studios, so that reverb choices can be added later using plugins. Recording in reverb-prominent spaces can be handcuffing further into the process, as natural reverb isn’t easily removed at a later date.
Reverb types
Broadly, reverb (whether hardware or software-based) falls into one of two categories.
- Convolution reverbs use recordings of real spaces (called Impulse Responses), which are ‘convolved’ with the signals you feed them to produce accurate, ‘photo-real’ reverbs.
- Algorithmic reverbs use a process more like synthesis (indeed, they’re sometimes referred to as artificial or synthetic reverbs). They emulate spaces and offer you controls to help design the space of your choice. Whilst algorithmic reverbs aren’t based on real recordings, what they lack in realism, they make up for in warmth and flexibility.
Valhalla reverb
So let’s get back to the Valhalla reverb.
Why is it so popular with our producers?
Simply, it’s the combination of sound quality, flexibility and affordability which makes Valhalla VintageVerb such a popular choice.
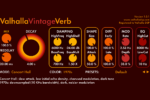
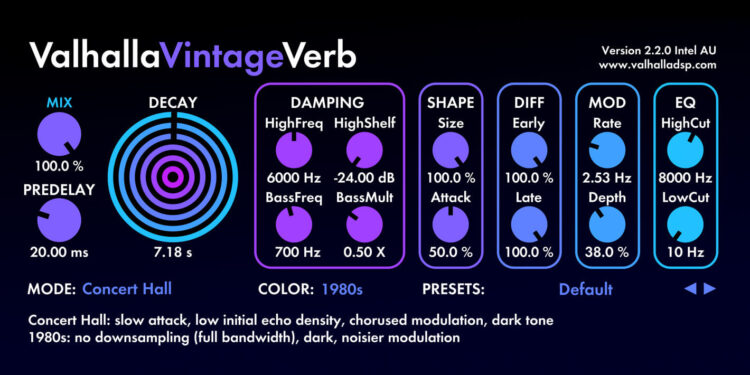
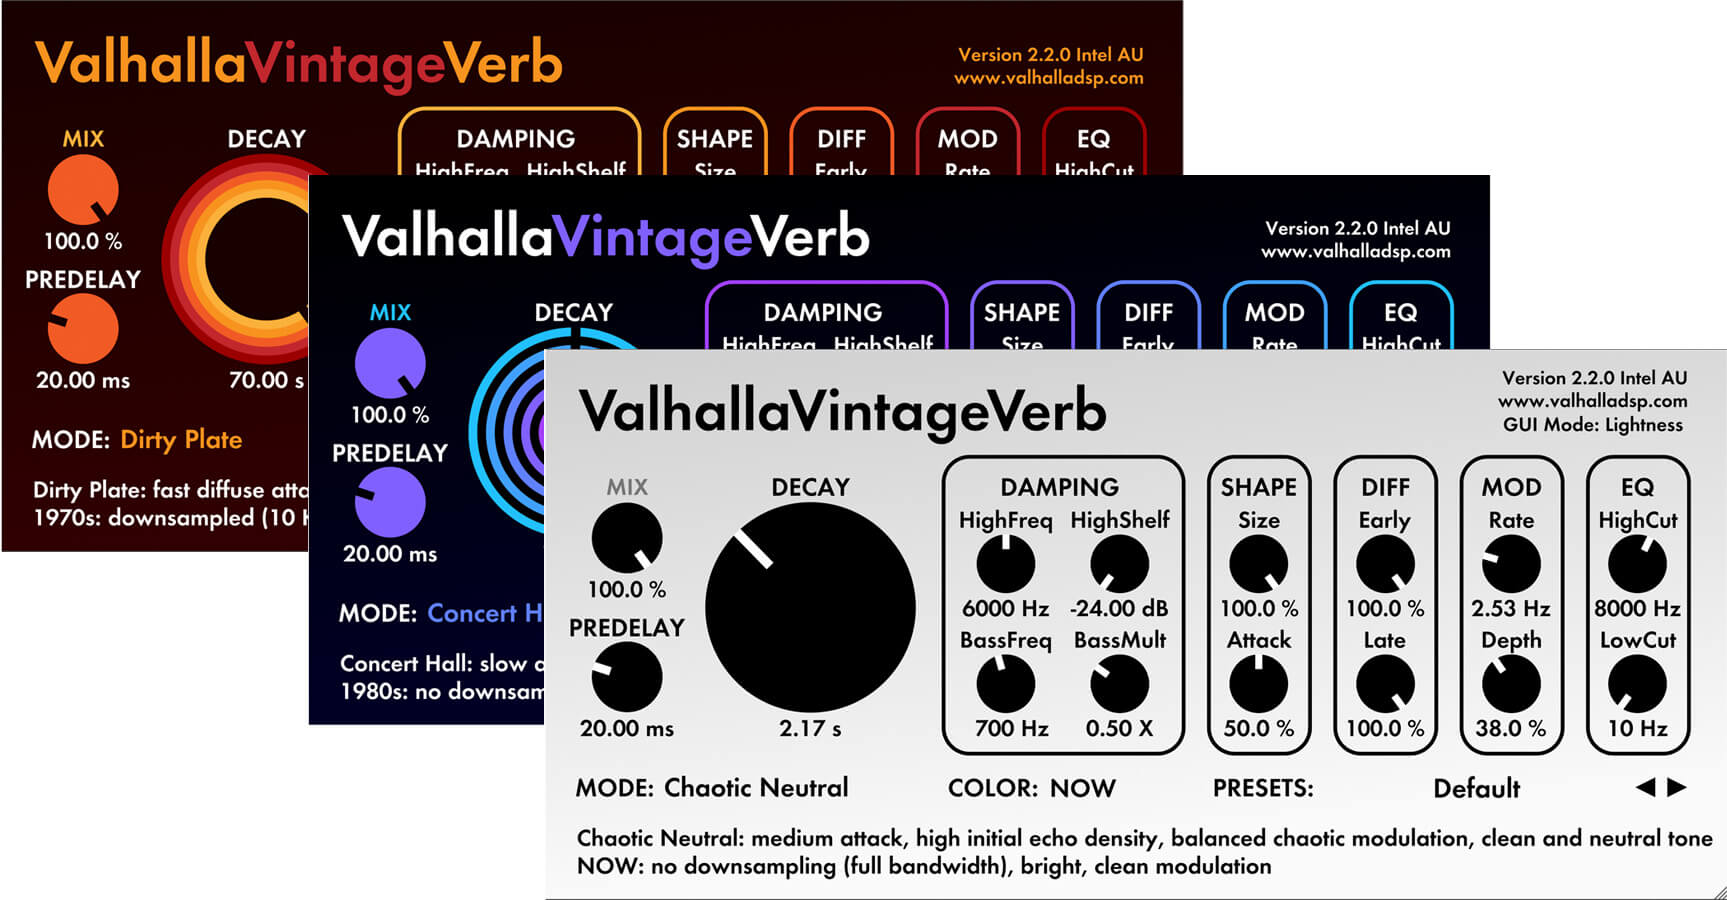
There are three sonic ‘eras’ from which to choose – referred to as Colors (note American spelling!) – with 1970s, 1980s and Now algorithms to create the canvas onto which your parameter choices will be painted. The 1970s algorithm is less clean, less predictable, noisier and less hi-fi. The 1980s algorithm retains the plug-in’s rich internal modulation but offers a brighter, more pristine reverb quality, whilst the cleanest, most transparent reverb is offered by the ‘Now’ setting, which makes a more digital, colourless reverb its main priority.
Having chosen a Color, the surrounding parameters are common, albeit they’ll behave differently depending on which option you’ve chosen.
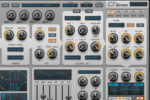
How to use Valhalla VintageVerb
Let’s start in the top left-hand corner.
Mix
The ‘Mix’ dial blends between Dry and Wet signals. At 0%, the signal is only Dry, at 100%, it’s only Wet. The latter is the choice to make if you’re using VintageVerb on an Auxiliary or Bus, whereas you can choose a Mix blend which sounds right to you if you’re using VintageVerb on a single track via an Insert point.
PreDelay
Below this, PreDelay controls the length of the gap between the original source sound and the reverb you’re adding. If you want to hear your source sound before the reverb is added, experiment with more generous pre-Delay times. If you want the reverb to sound more immediately, opt for lower millisecond values.
Reverb Mode
Just below the Pre-Delay option is the reverb Mode. This sets the type of reverb you want to use.
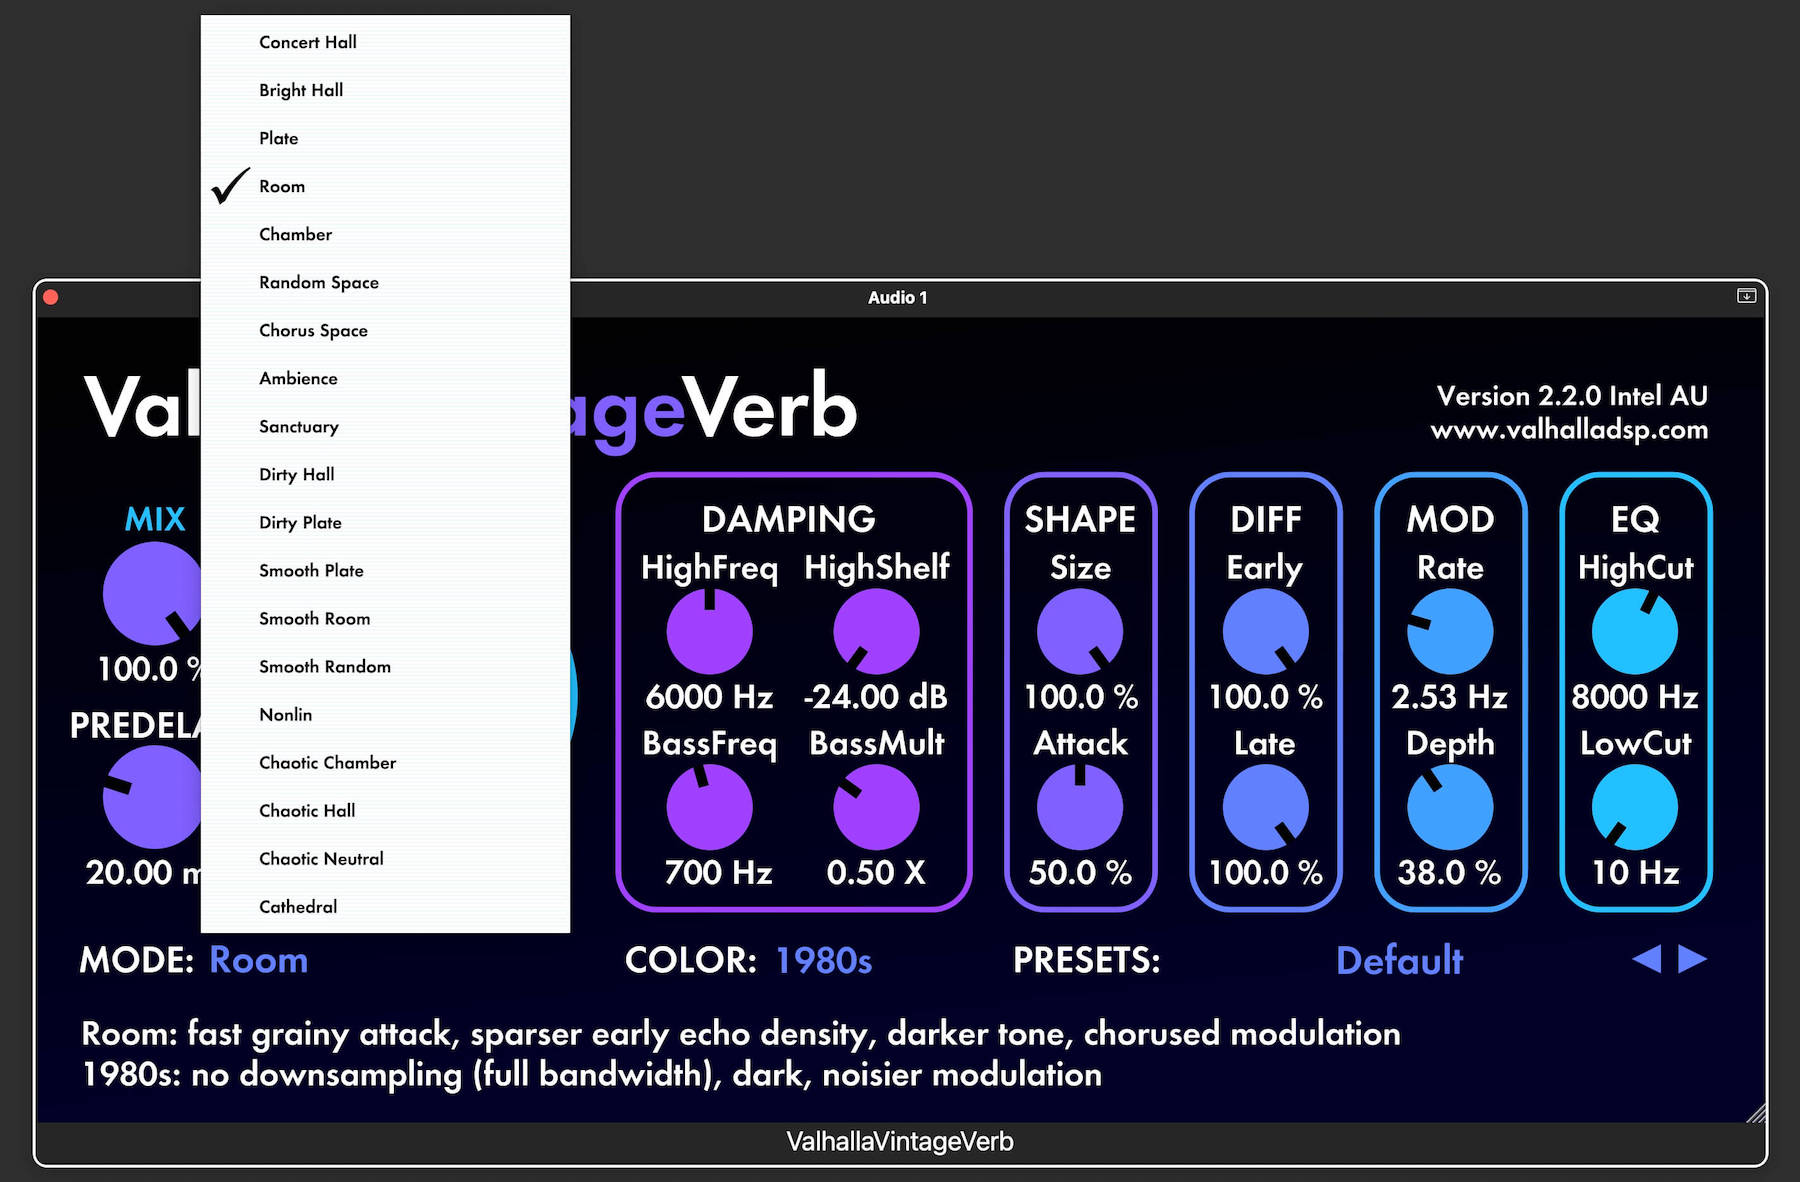
There are lots of options, which are: Concert Hall / Bright Hall / Plate / Room / Chamber / Random Space / Chorus Space / Ambience / Sanctuary / Dirty Hall / Dirty Plate / Smooth Plate / Smooth Room / Smooth Random / Nonlin / Chaotic Hall / Chaotic Chamber / Chaotic Neutral / Cathedral. Each of these emulates the behaviour of classic algorithmic reverbs and perhaps best explains why VintageVerb is so popular; it’s a reverb of many personalities. Usefully, you’ll get a brief description of the sonic personality of each Mode as you hover over the current setting.
Decay Time
Next comes the all-important Decay Time, which sets the reverb time for whichever Mode and Color choice you’ve made. Whereas Convolution reverbs have a fixed reverb time based on the decay length of the spaces in which their impulse responses have been recorded, algorithmic reverb offers hugely generous reverb times so you can create larger-than-life, epic reverbs. This partly explains its popularity with sound designers. VintageVerb’s maximum Decay Time is a gargantuan 70 seconds!
Damping
The Damping section lets you control the reverb’s personality from a tone perspective. The High Frequency dial lets you choose the upper frequency limit for the reverb, whilst the High Shelf dial next to it contours how much level you want to roll out of the reverb above that frequency. There’s a Low Shelf dial for low frequencies too, whilst low end Damping is addressed by the BassMult(iplier) dial, which boosts or attenuates the reverb length of frequencies below this point, as a proportion of the overall Decay Time. For instance, with a Decay Time of 5 seconds, a 0.5X BassMult setting would roll frequencies below the Low Shelf threshold down to 2.5 seconds in length.
Size and Attack
The Size and Attack dials let you contour the Shape of the reverb space you’re designing, not by changing the reverb time, but by designing the proportions and behaviour of the way reverb is generated within that virtual space.
Diffusion
Diffusion comes next, with separate dials for Early Reflections (the first reverb echoes, which tend to be brightest and clearest) and Late reflections, which are the later, quieter, richer echoes we associate with true reverb.
Modulation
And then comes the internal Modulation options, which will behave differently, depending on the Color and Mode options you choose. Modulation introduces a low frequency oscillator (at the Rate of your choice) to introduce Chorus style effects, adding richness, warmth and thickening of the reverb tail.
EQ
Lastly, there are EQ controls to tame the tone of the reverb shapes you’ve created. HiCut and LowCut attenuate high frequencies and low frequencies, respectively. These dials are different to the damping controls; whereas Damping lets you create a reverb shape, the EQ controls allow you to control volume of that shape for low and high frequencies.
Getting started with the Valhalla reverb
As with any plug-in, the best way to learn the capabilities of VintageVerb is to dive in and dial away to your heart’s content. Start with the Modes; Plate reverbs often work well on vocals, to set a musically-pleasing ambience around a voice.
Concert Halls work well if you’re looking for a more cinematic, symphonic sound, so are worth considering if you’re writing trailer music, working with string parts, or programming more progressive EDM, including trance.
Ambience, with short Decay Times, is great if you want to add a reflective room reverb sound to a drum bus, which will appeal to rock, pop and Synthwave aficionados, among others.
Usefully, a brief description of every parameter is provided at the bottom of the interface as you hover over each dial, providing clarity for any function you’re unsure about.
If you’re looking for more in-depth information on Reverb generally, or vintage verb specifically, check out the Science of Sound course on Reverb, which explores this effect in great depth and in many different musical contexts.
Otherwise, use your ears to judge what sounds good. Try out different Modes to tailor spatial design to the sounds you’re using. Above all else, don’t worry about what’s ‘right’ or ‘wrong’, as these concepts don’t exist in production; many of the best records break what some internet forums will preach as ‘the rules’. Go and break them.