Logic Pro Alchemy: Making bass sounds
Logic Pro Alchemy is capable of producing some truly iconic bass sounds
Though in other genres it often performs a purely rhythmic, functional role, in the world of dance music bass is king. In many dance records the bass element is often the primary melodic element. This is particularly true in “bass” genres such as dubstep, drum and bass and 140, where tracks often only consist of drums, bass and occasional atmospheric elements.
With all that focus on the bass in your track, it’s very important that your low end sounds great. Thankfully, Logic Pro users can make use of its powerful sample manipulation synthesizer Alchemy to cook up pretty much any bass sound you can think of.
In this article we’ll show the techniques you can use to design three essential bass patches in Logic Pro Alchemy, although you can use the principles of the walkthroughs in other synthesizers to get similar results.
Staccato disco bass
The first bass sound we’ll make is a classic staccato disco bass. Though this is a sound you’ll find all over disco records, you’ll also hear it in new wave and other related electronic-influenced genres.
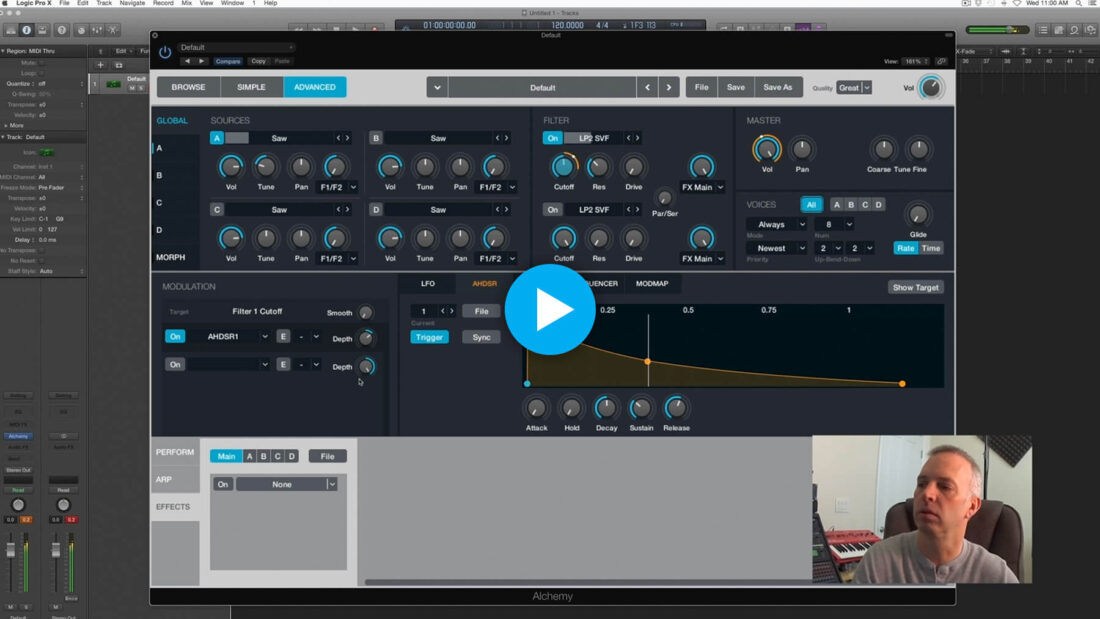
To see and hear this patch being made for real, check out free chapter from sound design guru Jim Stout’s Alchemy 101 course.
Let’s walk through creating that bass sound in Alchemy.
Step 1: Oscillators
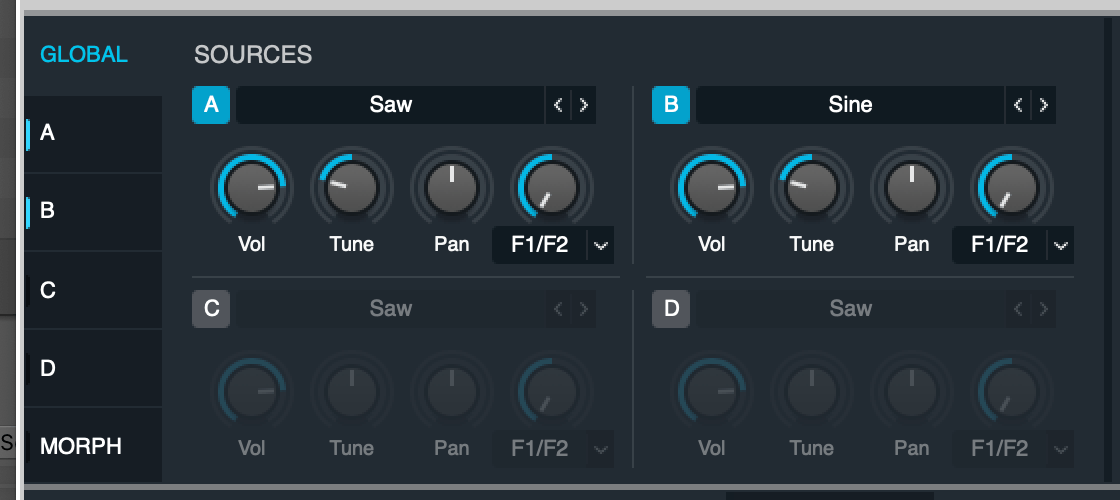
This sound is based on two oscillators: A sine and a saw wave. Add an oscillator of each wave and tune both down by 24 semitones.
Here, the saw wave provides the texture to our sound and the sine wave gives bass weight. For extra analog thickness increase the number of voices to two.
Step 2: Envelope
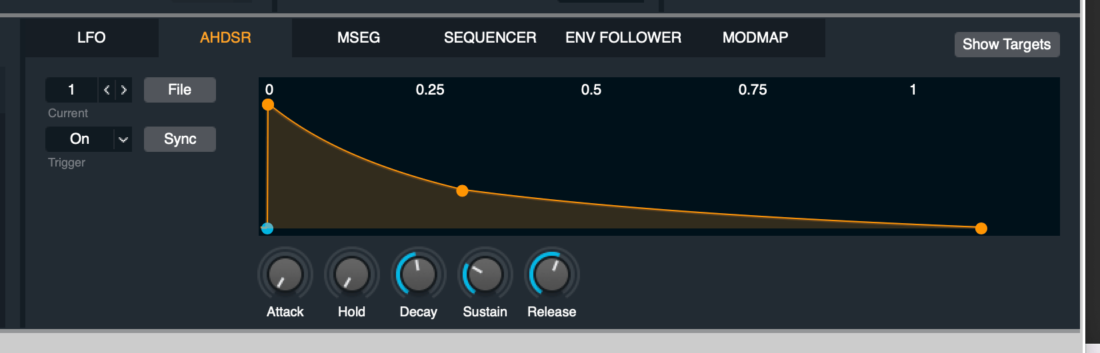
We need to adjust the amp envelope to give a short staccato bass sound. But we will also be using the same envelope to modulate the cutoff frequency of the envelope.
Keep the attack as fast as possible, set the decay to 0.3 seconds, sustain to around 30% and release to 0.7 seconds.
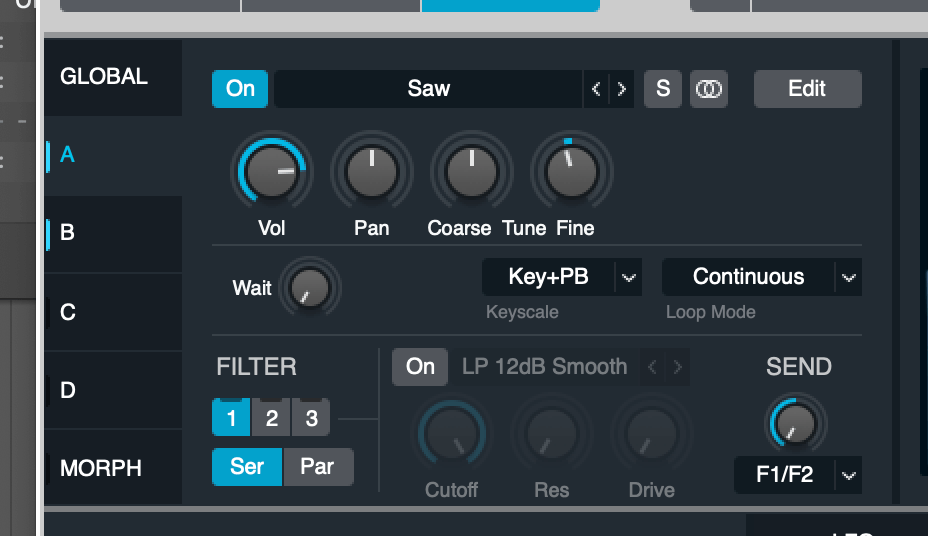
Step 3: Filter
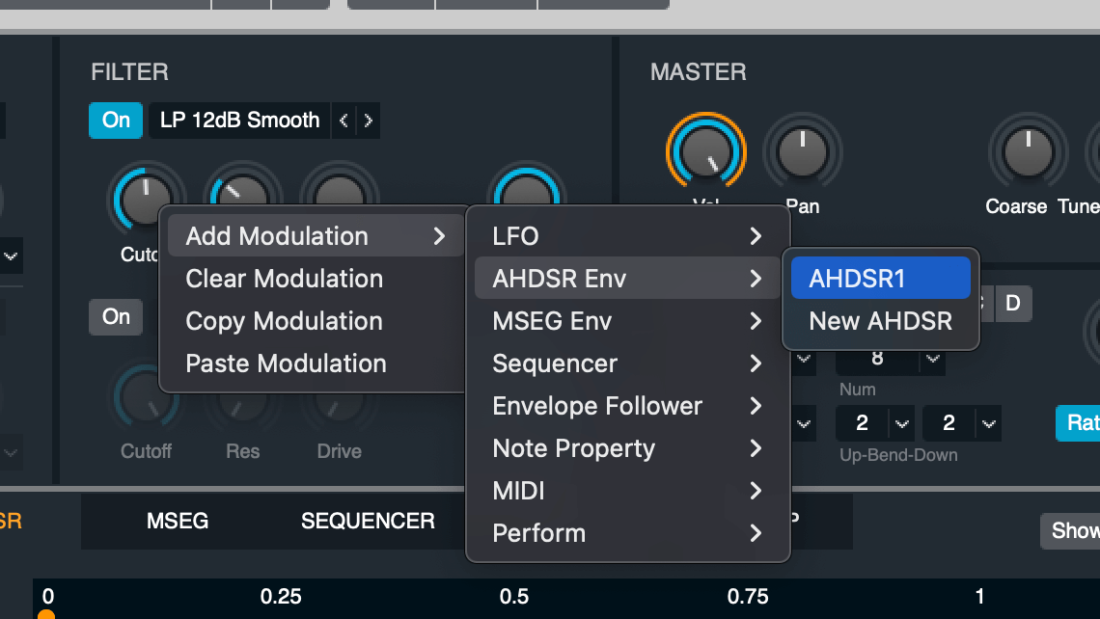
We just want to use a single filter. Set the cutoff to 500Hz and the resonance to 35%.
Now set the envelope so that it is modulating the cutoff of the filter.
Step 4: Arpeggiator
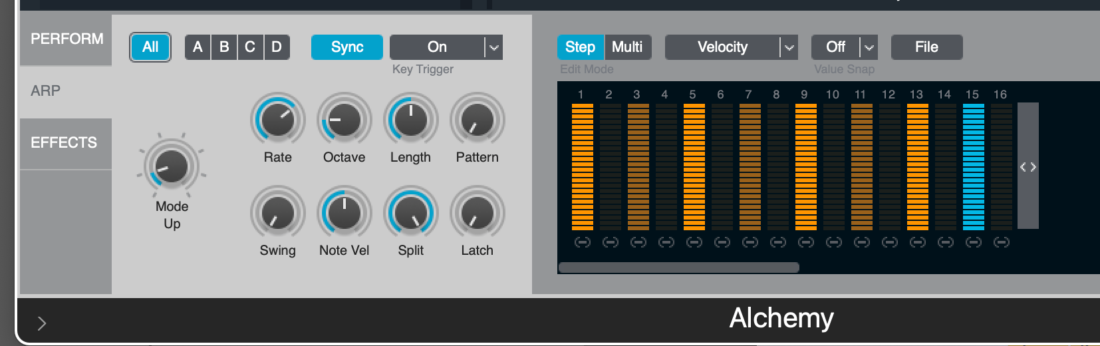
To achieve a proper disco groove, open the arp panel, set the octave dial to 2 and alter the step sequencer so that a note plays every eighth note (as in the above image).
Over to you, time to jam away! With this disco bass sound you should be able to recreate the Blue Monday bassline in no time.
DnB Reese bass
The Reese bass is a staple of drum and bass, and many other bass genres. However, the Reese bass first made its appearance in a house track.
‘Just Want Another Chance’ by Reese, aka Kevin Saunderson, is the earliest track featuring this iconic sustained, detuned bass sound. But what makes a Reese bass?
The Reese is a very basic sound, it simply consists of two detuned saw waves. The distinctive detuned wobble occurs because the saw waves move in and out of phase with one another over time.
Let’s build a Reese bass from scratch using Logic Pro Alchemy.
Step 1: Oscillators
Turn on two oscillators in Alchemy and set each to a saw wave. We need to detune each of the oscillators slightly.
By default the oscillators are displayed in the global view where you can alter all of the oscillators simultaneously. To access fine tuning we have to go to each oscillator’s dedicated view.
Once there, tune one oscillator up by 10 cents and the other down by 10 cents. Feel free to experiment with how much detuning you perform, there is no set rule here.
Step 2: Filter
To tame the bass sound, activate a filter in Alchemy and bring down the cutoff to around 100Hz. As with the detuning in the previous step, there is no correct value to set the filter at, nor is there a correct filter slope. Experiment with different settings here and see what sounds best to you in the context of your track.
Step 3: Distortion
Finally it’s time that we add a bit of distortion to the bass sound to fatten it up.
Go to the effects section at the bottom of Alchemy’s UI and choose the Distortion module from the drop down menu.
Again, there are no set rules here. Alchemy’s distortion module has four different types of distortion built in which gives you a lot of creative freedom. Tube is always a safe bet but play around and blend in enough character to thicken up the sound to taste.
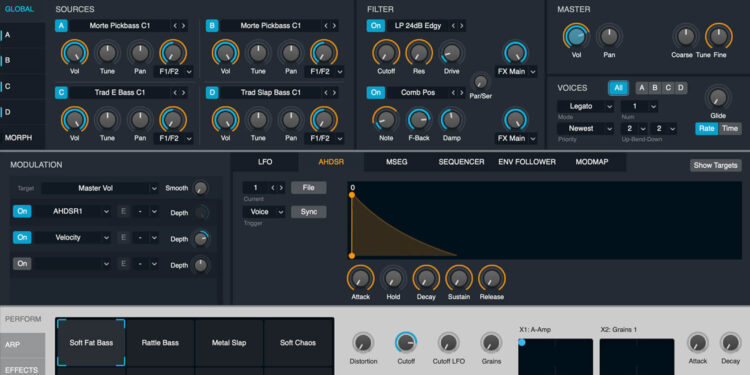
Dubstep wub bass
The secret to a dubstep wub bass is filter modulation. That “wub” sound is simply the cutoff of the synth’s global filter being modulated by an LFO.
Aside from that the oscillator sources for a dubstep bass can vary wildly depending on whether you want to create a more subtle original dubstep bass in the style of early pioneers such as Skream, or a more modern and mid heavy “brostep” style bass.
Here we’re going to use additive synthesis within Alchemy to achieve something in the middle.
Step 1: Oscillator
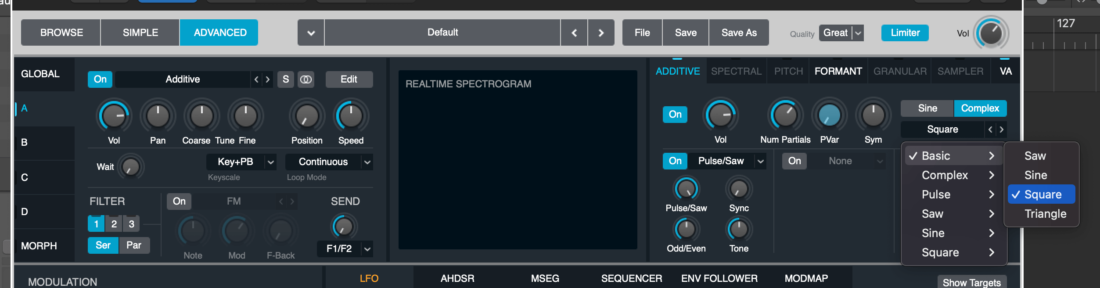
Load a sine wave in oscillator A. Go over to the Additive tab in the top right hand corner of Alchemy. Press the On button, select Complex, and then select the square wave from the drop down menu.
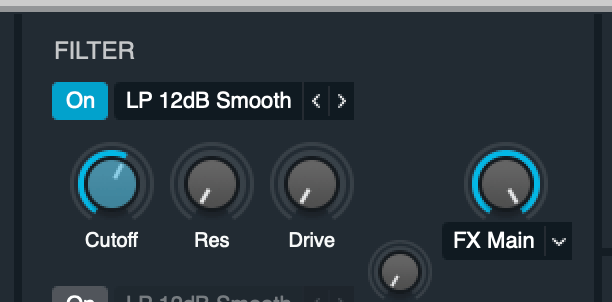
Step 2: Filter
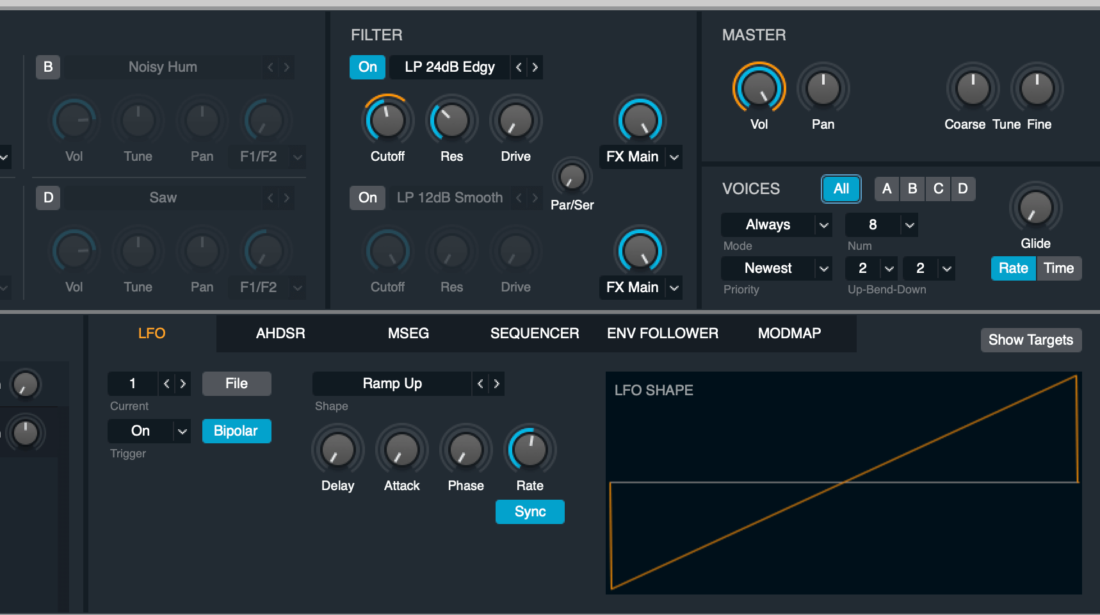
Choose the LP 24dB Edgy filter type and set the cutoff to about 420Hz.
Right click on the filter cutoff and select the LFO as the modulation source. Set the LFO shape to ramp up and the rate to 1/4T.
Now adjust how much the LFO modulates the cutoff in the modulation panel.
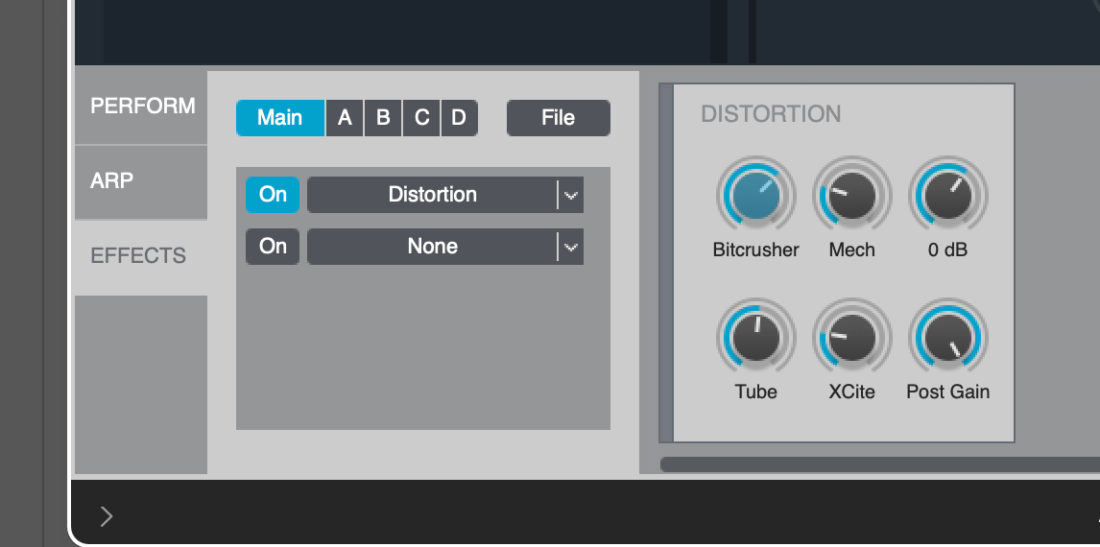
Step 3: Distortion
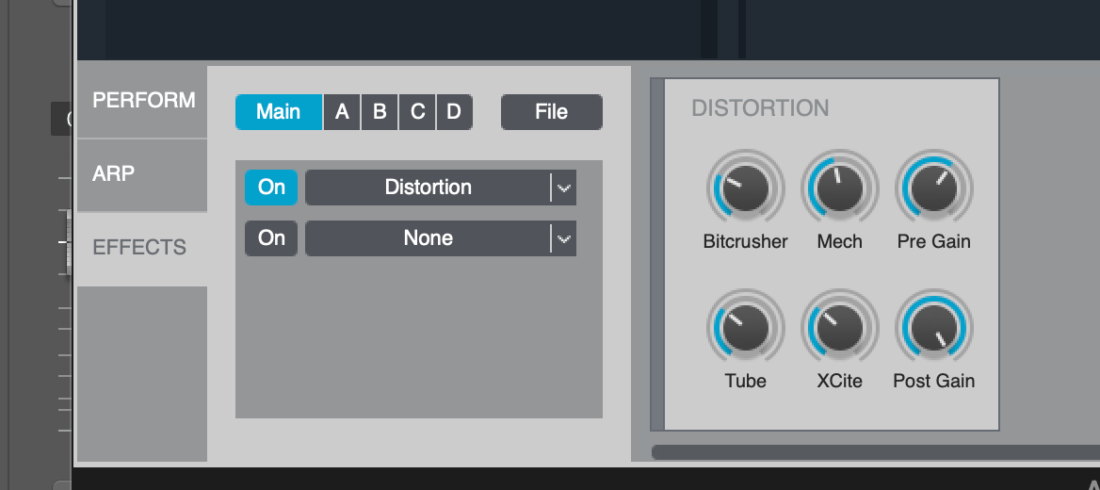
For that extra bit of grit let’s add distortion. Select the Distortion module in the effect section at the bottom of the Alchemy UI.
Use the various distortion modes in Alchemy’s distortion unit to ramp up the aggression in the sound. As you can see from the image above, we’ve gone full tilt and used all of them in our patch.
Dive Deeper into Logic Pro Alchemy
If the above sound design tips have whetted your appetite to learn more about Alchemy’s potential, Jono Buchanan is here to give you a deeper dive into this amazing synth. As part of his Making Music with Logic Pro: Intermediate course, he has a section dedicated to Samplers and Alchemy in particular.