5 Music Production Workflow Tips Every Producer Should Know

Keep yourself organized and make your music production workflow process more efficient with our five key tips
We get it, music production workflow isn’t the coolest part of being a producer. Shouldn’t we all be off building better drops, tuning kicks and humanizing drums instead of counting the loose staples in the desk drawers?
In reality, workflow can be a secret weapon in music production, and even the difference between success and failure. Of all the top producers whose studios we’ve filmed at, almost every one of them had managed their DAW project meticulously in the run-up to the session, a habit they’ve learnt is more valuable than it seems at first.
We’ll get straight in with our number one attitude for music producers…
1. Stay in the Zone
In his FaderPro course, Reconstructing Revolution, the hard house hitmaker BK explains why you need to keep your mind in the right place while producing.
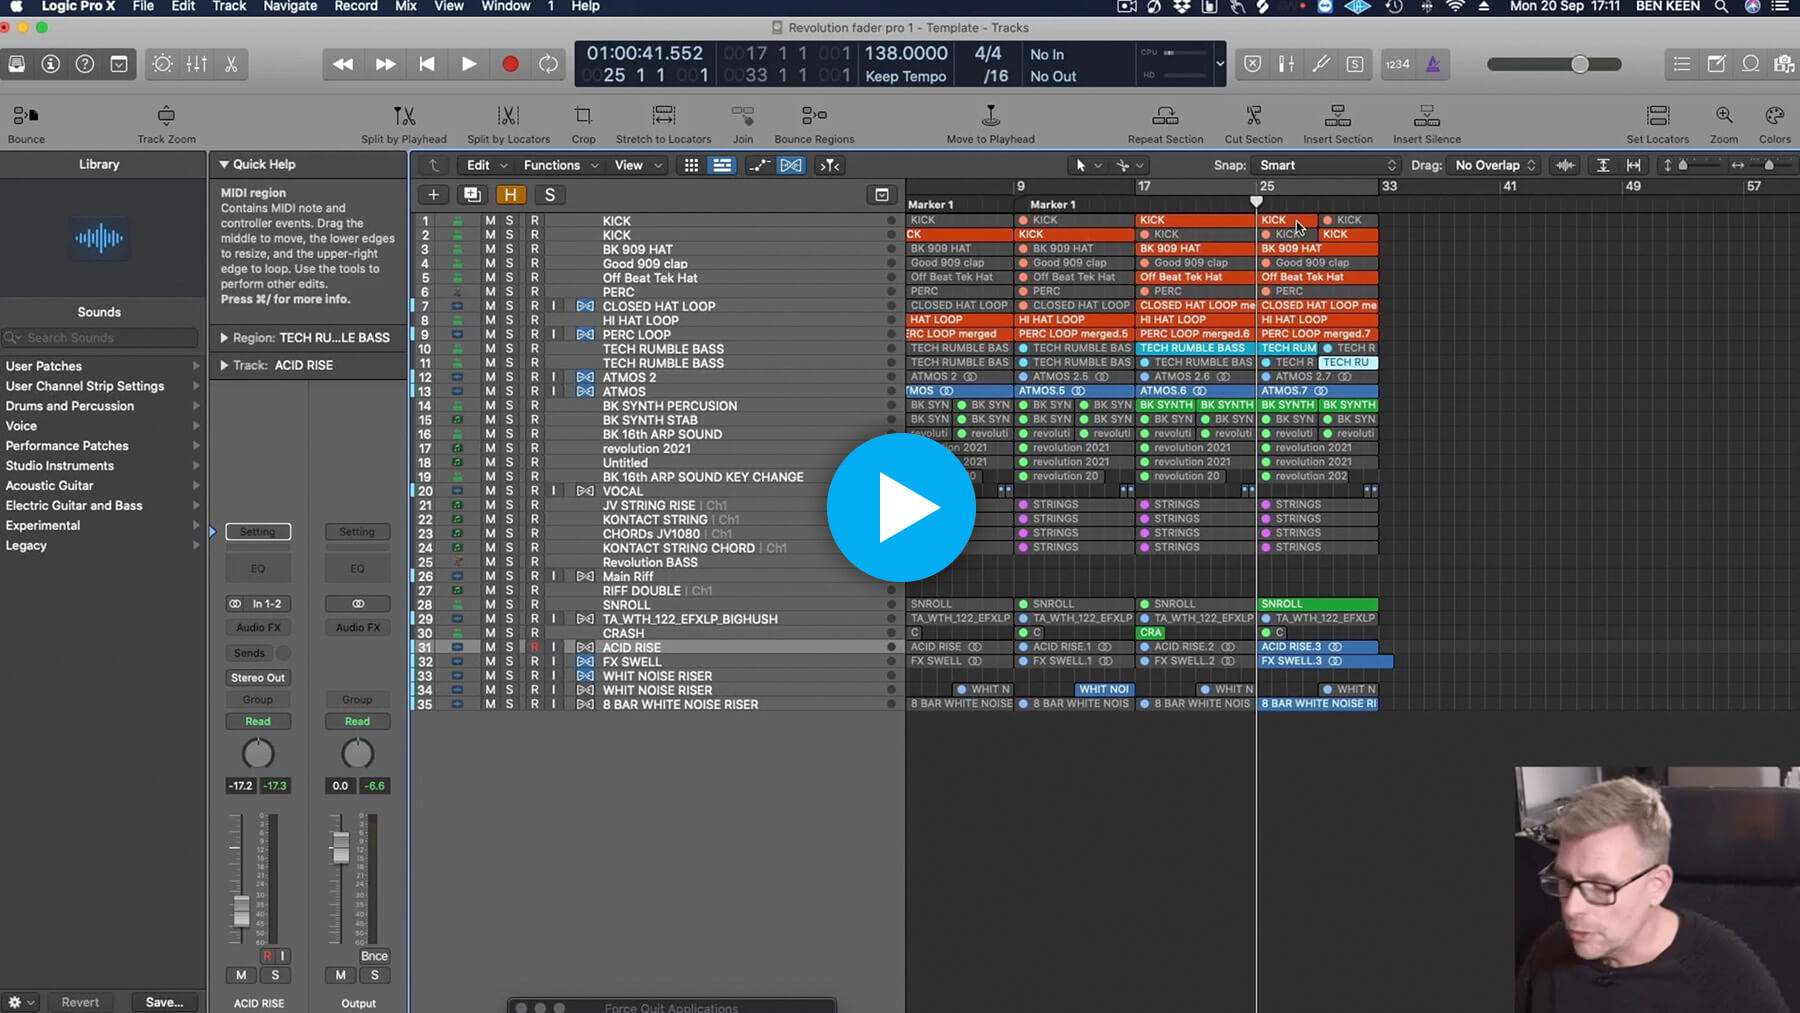
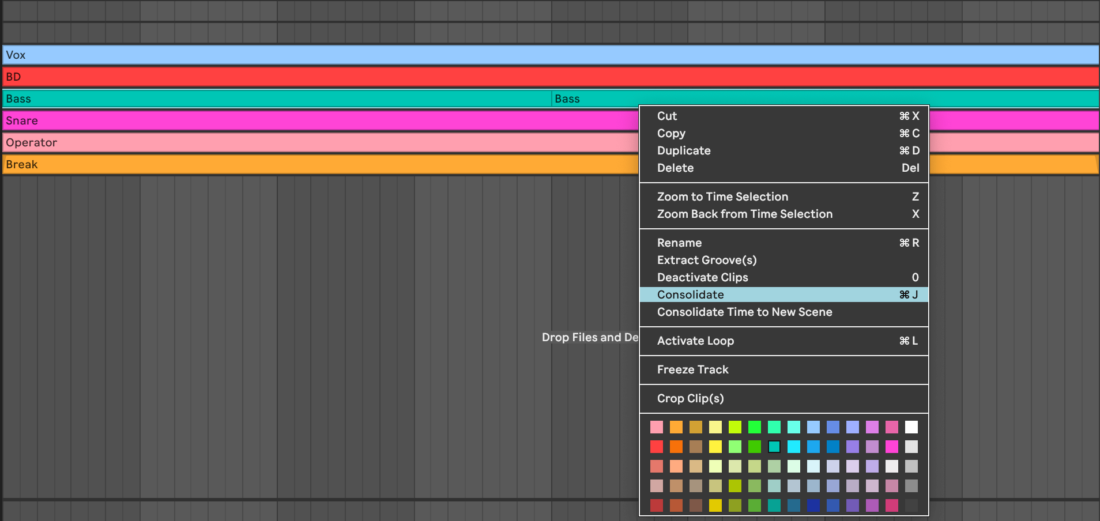
To drive it home, BK explains that attending to your DAW project housekeeping while you’re trying to be creative can be a disaster for getting things done. Messing with track colors and names, moving things around or even installing a new plugin will distract your mind and drain all the blood from your musical cortex.
His main point is that there’s a time to sort your project out and a time not to. Having a grip on your workflow and management is key to getting faster and more effective at learning music production, but don’t let housekeeping disrupt your ideas. Instead, find times when the creative waves have died down, and use them to sum up and gather your project together.
2. Know your keyboard shortcuts
Every DAW has a huge list of functions, most of which we never use. But the functions that we do use – duplicating, looping, adding tracks, splitting regions, bypassing plugins, applying fades… – are so often needed that it’s a no-brainer to learn and use the keyboard shortcuts for them. Here are two ways to help yourself get familiar with your DAW’s keyboard shortcuts…
First, go analog: use some sticky notes, attached to your monitor screen, to note down a few key shortcuts that you don’t know but will find useful. When you need them, they’ll be right there with you. Once these shortcuts have solidified into your muscle memory, take off the note and grab a new one, listing a few more keyboard shortcuts that you’re on the cusp of knowing and needing.
Another tactic: whenever you find yourself in your DAW’s menus looking for a function, you’ll usually see the keyboard shortcut for that function displayed right next to it in the menu. Here’s the crucial part: instead of selecting the function from the menu, check out the shortcut, close the menu and use your keyboard instead. This simple step makes sure the desirable behaviour happens, and makes it more likely it will happen next time.
3. Use templates
It’s more than likely that your DAW comes with a way to create a template project, or a way to have a certain set of things loaded ‘on startup’ as soon as you break ground on a new project. You may know about this already, and it’s hardly a groundbreaking discovery if you didn’t, but our key input here is to suggest what you should add to that template for a speedier music production workflow and more effective music making.
Our startup template of choice includes a 4/4 kick pattern, a likely tempo setting for an average project, and markings for where your intro, main loop, drop and other sections might take place. How about loading some of your go-to plugins on your master (spectrum analyzer, referencing plugin, clipper, etc), and even any instruments and synths that you tend to use every time.

4. Get your references ready
Many producers work with reference tracks by their side. By loading up a few ‘target’ or ‘similar’ tracks that they want to get their new track on a par with, they can occasionally flip between the current project and the target track, keeping your ears anchored to where you want to be – not just to where you are.
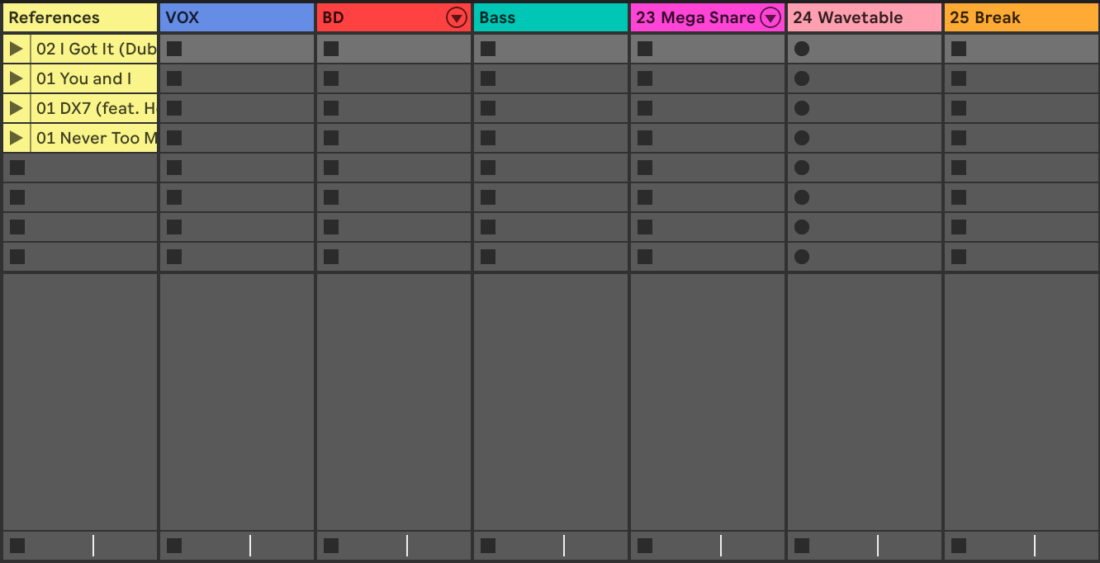
If you’re going to get your references ready, there are some ways you can make it simpler: you could load them into your DAW’s template project so that they’re right there when you start a session, or use a plugin designed for referencing such as Mastering The Mix Reference 2 to get things loaded on your master bus and ready to go every time.
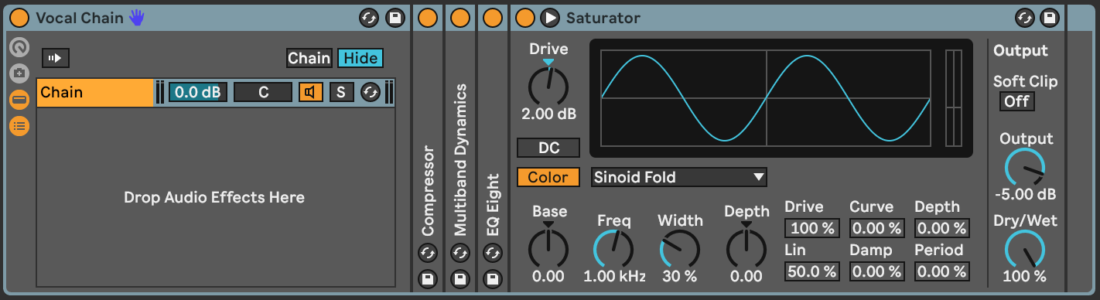
5. Set up plugin favorites and effects chains
Does your DAW offer a list of starred plugins or Favorites folders? If you haven’t spent ten minutes choosing your most-used plugins and throwing them in there, you’ve got some work to do. Lots of time spent searching for the right plugin will interrupt your music production workflow and block your creativity. Whittling your selection to just a focused list of the instruments and effects you actually like is a perfect way to save time on scrolling and searching when you’ve got a melody in your head that’s about to fall out of your memory forever.
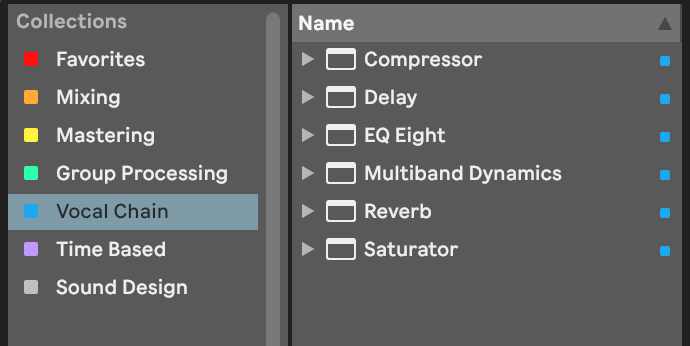
On a similar tip, check out how your DAW handles full plugin chains. Vocals, for example, are something most people tend to process in the same way – so why not have a standard chain of plugins that you can drag straight onto vocal samples or recordings? The same goes for drum busses, sub bass, and any other instrument you’re likely to use every time.