How to Make Monster Build-ups

Build-ups are a key part of electronic dance music, creating tension and impact in a track. But what’s the secret? Read on to find out how to create monster build-ups in your own music.
Electronic music is an art of movement – getting people from one place to another. Within a few bars of a loop, the sound might not change all that much, but as an arrangement cleverly moves between sections, it creates emotion, change and a sense of purpose. One of the keys to getting this art right is the technique of the build-up transition.
The purpose and construction of a build-up might change from track to track, but their meaning is the same: you indicate to the listener that something is about to happen, creating a feeling of tension and slowly ramping it up to a climax, before letting go into a new part of the tune.
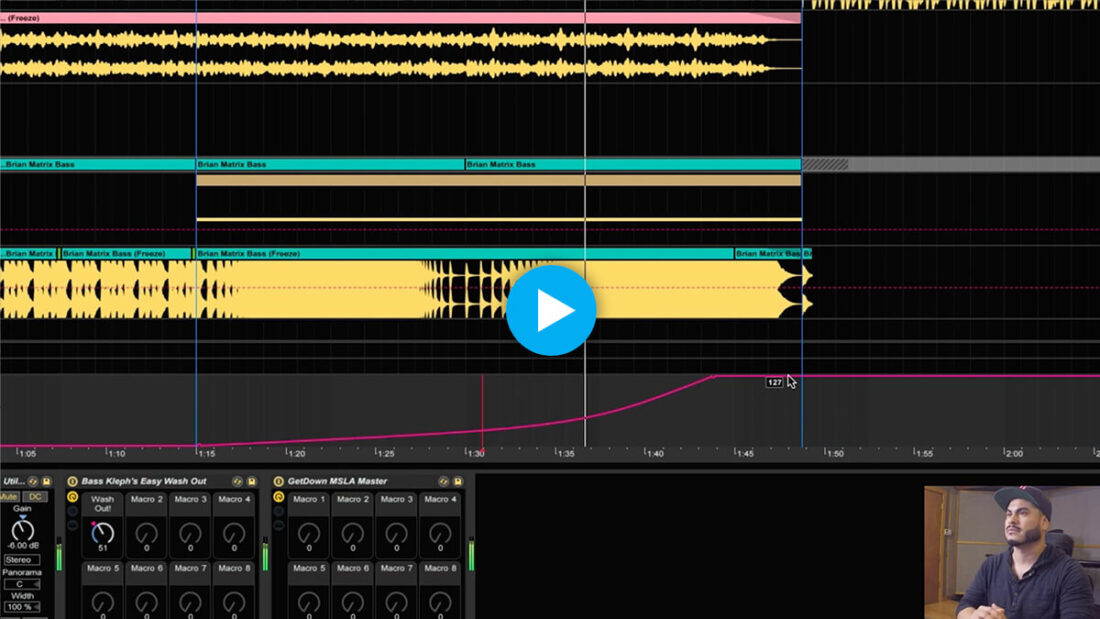
In this free chapter from his In The Studio course, Brian Matrix shows us how he builds up a washed-out sound leading up to a transition, resolving the tension right after with a new section of the track. Watch the video then we’ll discuss his ideas and more in the article below.
What goes into a great build-up?
Let’s get technical.
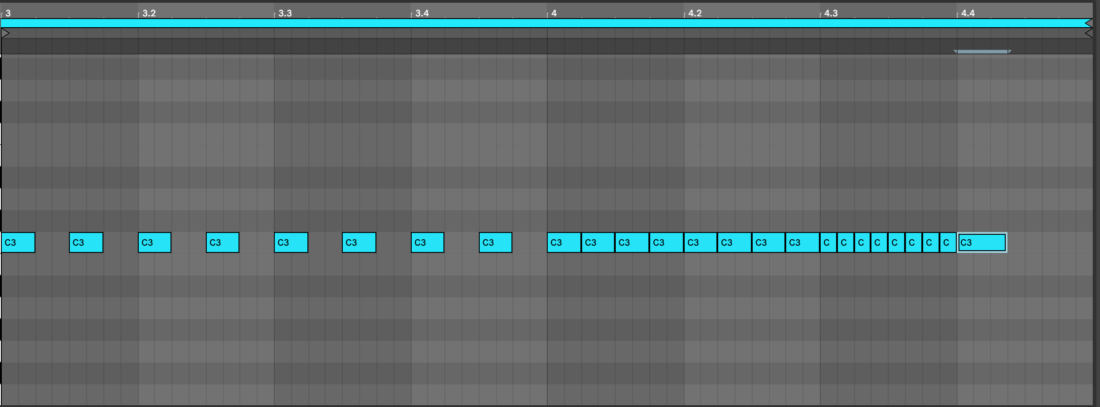
A build-up happens over a number of bars – usually 8 or 16 – the underlying music starts pretty much as it has been, without much new being introduced, but in the final few bars, things tend to get faster. This is where we usually find the infamous snare roll, getting faster and faster.
What’s special about build-ups is – generally speaking – the application of effects. Over the course of the build, these effects will get deeper and deeper, soaking up more of the sound to help indicate that something big is coming.
The tension is often ramped back down over the last bar of the build-up, and much of the time a quick vocal chop or melodic sample is placed here to offer a quick exclamation mark that also foreshadows the theme that’s about to start in the next part of the track.
A great example of this is the build up in Lola’s Theme by The Shapeshifters, which starts from near silence before opening up the sound using a low pass filter and increasing the volume of a snare roll.
Fatboy Slim’s Praise You also utilizes a snare roll to build up the energy, this time a doubling snare roll that gets twice as fast as it goes on.
Freed from Desire by Gala uses a snare roll in conjunction with filtering, and uses part of the main vocal section to signify the transition from the build up to the chorus.
What effects should you add in build-ups?
In Brian Matrix’s free In The Studio video above, he uses an Ableton rack called Bass Kleph’s Easy Wash Out to apply a suite of typical transition effects using a macro to control them. The effects in Easy Wash Out are a great starting point to deconstruct build-up technique.
Auto-Filter is a clear favorite for builds, using a high-pass filter to slowly take out more and more bass frequencies across the course of the transition. Not only does this increase the tension of the build, but when the drop takes place at the end, it’s all the better as the bass drops back in all at once.

Reverb is a less obvious candidate for your builds, but it contributes hugely to the ‘wash out’ effect in question. By ‘blurring’ the sound and making it harder to grasp as the build progresses, the reverb acts to make things go out of focus before they come back into perfect view with the start of the next section.
EQ might not be the immediate go-to for build-ups, but in addition to filtering, creating resonant bumps or notches in the frequency spectrum gives your listener that little extra indicator that things are in motion towards a goal.
A Compressor isn’t just added to make your drums knock harder. Actually, in this case, putting a compressor after the reverb processor simply helps to wash things out more, smearing transients and making drums less recognisable and less impactful before they come into clarity again.

Stringing it all together with automation and curve shape
Now onto the technical side of the build-up techniques. The parameters of your effects can’t just stay static throughout the build – to add movement, they have to be constantly evolving.
By setting the parameters in question (high-pass filter frequency, reverb amount, etc) to a macro control, we can automate everything at the same time. Each DAW will handle macros differently, so check out yours to find out how to group multiple parameters under the same control.

Generally, you’re also able to set lower and upper bounds for each parameter’s movement throughout the macro’s range. You might want to sweep the high-pass from minimum to nearly maximum as you move forward, but only bring the compressor’s threshold down a small amount from start to finish. By setting their values at the macro’s minimum and maximum values, you can make this work as it should.

Finally, it’s worth paying attention to the shape of the automation curve you draw to control these effects. It might be tempting to draw a straight diagonal line from start to finish, but this is rarely a way to make music sound natural…
In fact, your ideal automation shape will often turn out to be a curve that starts slowly and only begins to build itself towards the end of the build, doing so quite quickly. Check out Brian Matrix’s curve in the free video at the top of this article for a great example.
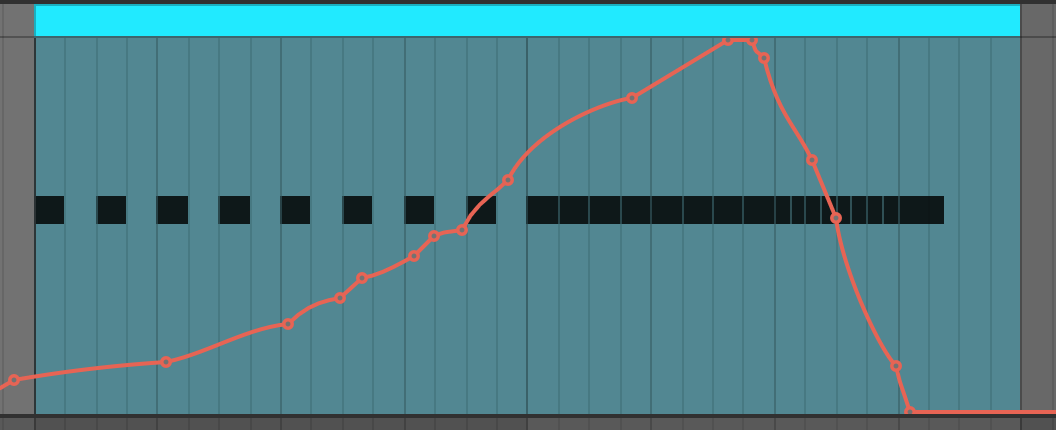
Why does this automation curve shape work? Music doesn’t seem to work with straight lines. For example, the notes we play double in frequency with every octave, and the drum rolls at the end of a build-up double in speed with every beat. These elements are also moving in an exponential fashion, not a linear one, and your effects should sound better following a similar path.
So, there you have it – a bunch of tips to help you take your build-ups to the next level. Enjoy!
