Using an Audio EQ to Carve Space in Your Mix
Audio equalizers have been around in one form or another since the 1960s. In that time, the audio EQ has earned its place as one of the most widely used tools in the world of music production and sound engineering.
In this free chapter from Brian Matrix’s FaderPro mixing and mastering course, the seasoned studio professional gives us a crash course on using EQ to carve space in your mix, ensuring that each element has its own space in the frequency spectrum.
Cutting unwanted frequencies
As Brian explains in the video above, it’s common practice to remove unwanted frequencies in each of your tracks. This might be to tackle undesirable characteristics such as boxiness in your bass or harshness in your vocal.
There are some frequency ranges that are commonly considered to be the cause of particular tonal characteristics within your tracks. For example, “nasal vocals” tend to have a lot of information around 1kHz; you can often reduce “boxiness” by taming frequencies between 200Hz and 700Hz; and unwanted rumbling usually occurs in the frequencies below 100Hz. Above all, though, it’s important to use your ears to understand what’s going on in your track.
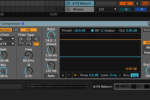
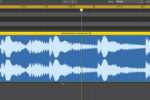
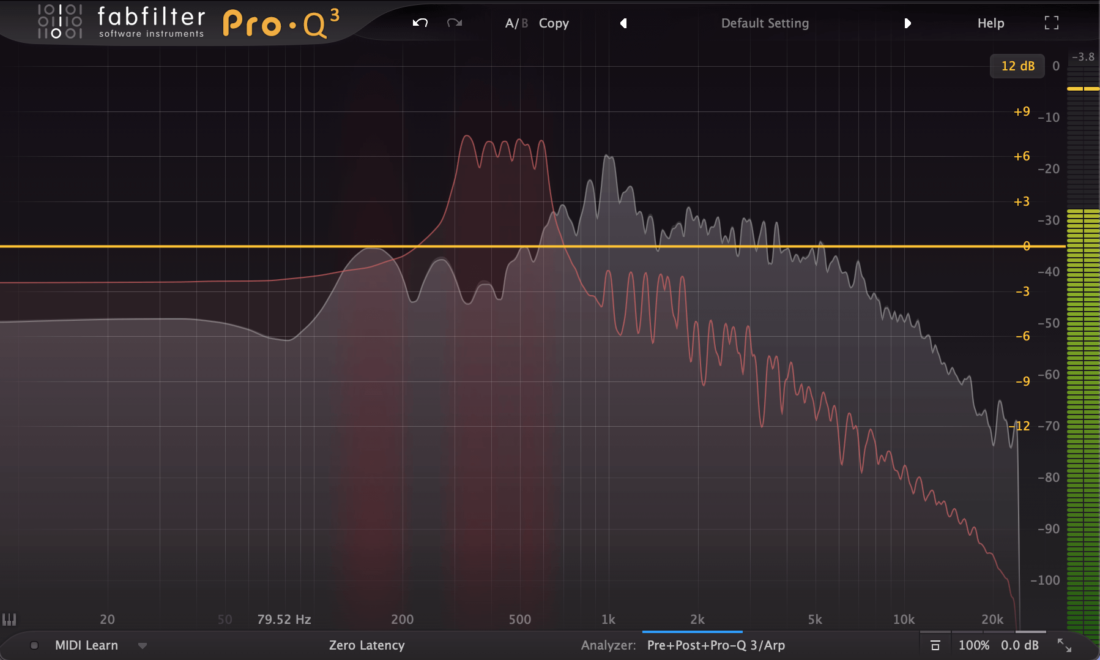
Your chosen plugin should have an audition function, so you can solo the frequencies that you’re currently modifying. Use this to sweep through the frequency spectrum and listen out for any unwanted resonances, ringing or dissonant tonal characteristics.
There’s a ringing at around 7kHz in this pluck sound that is extremely noticeable when auditioning that particular frequency range, but reducing its level by nearly 5dB helps to control it.
Frequency separation
Another common use of EQs is to reduce the level of a certain frequency band within one track to make room for the same frequency within another track.
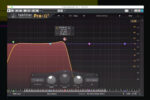
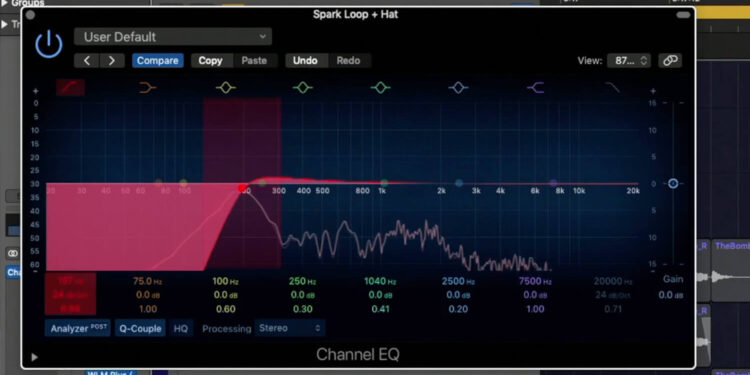
In this case, a rimshot is clashing with a synthesized arpeggio, causing them to sound muddied and unclear.
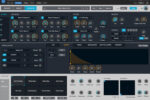
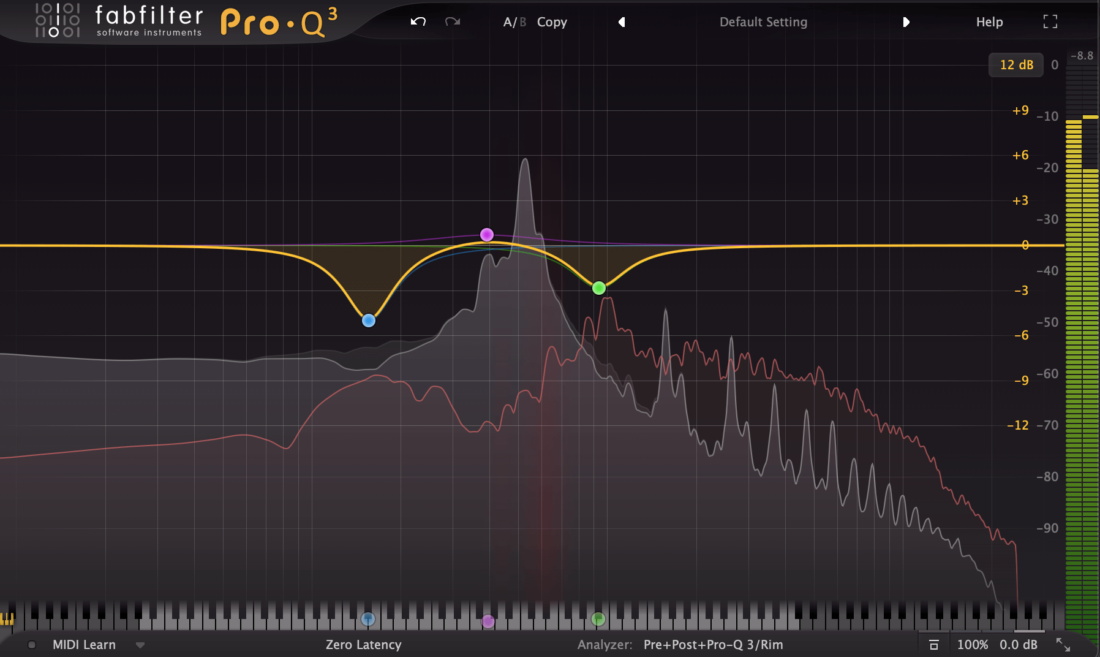
We can see from the combined spectrums of the rimshot (in white) and the arpeggio (in red) that there are some frequencies that clash with one another around 160Hz and 400Hz, which are indicated by the red vertical bands.
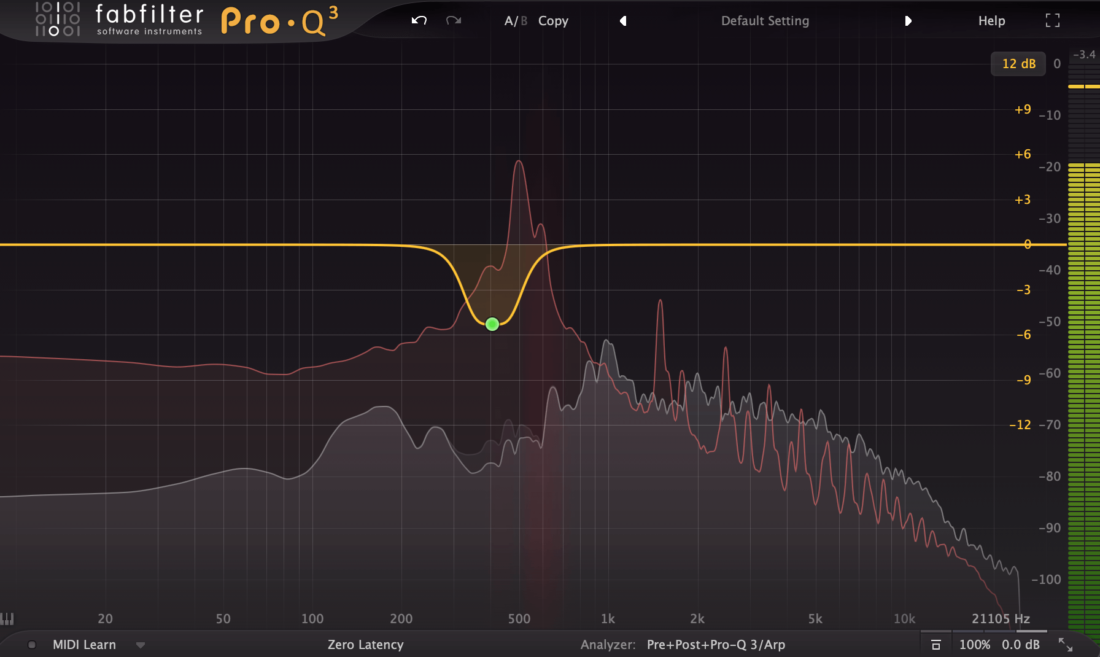
We can use a bell curve to carefully EQ out the arpeggio’s fundamental frequencies from the rimshot.
Similarly, we can use another EQ on the arpeggio to attenuate the space that is being occupied by the rimshot’s body and fundamental frequencies.
The immediate result is more clarity for each of these two elements, which will also provide some more headroom at the mastering stage.
Low Cutting
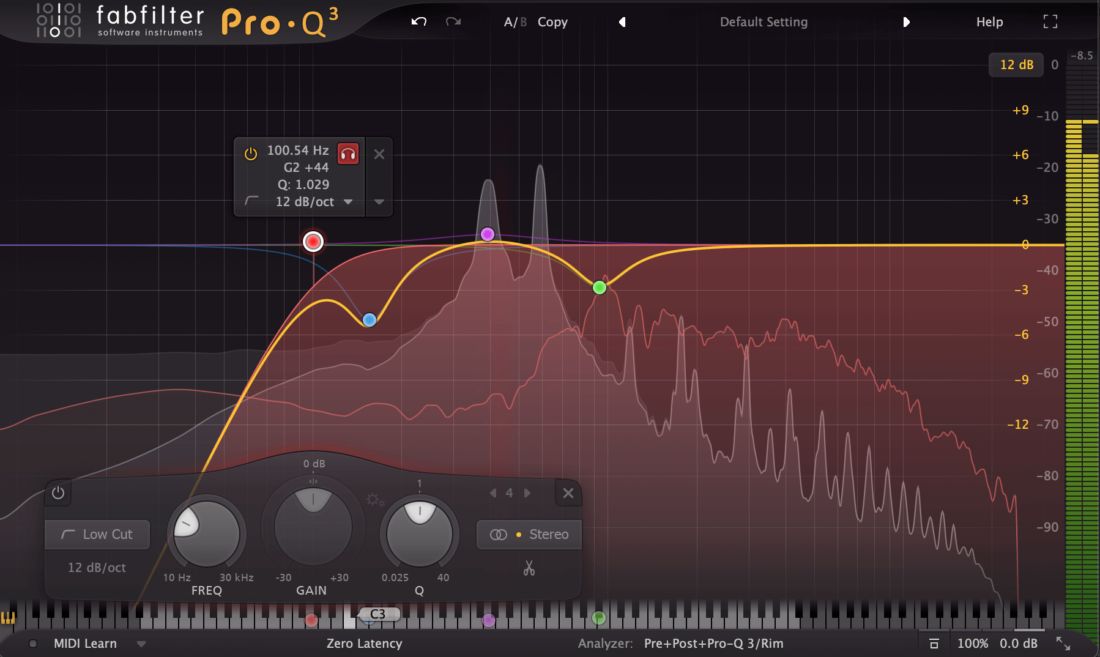
While we’re analyzing these two elements, we can also see that there is a lot of low end information that we just don’t need in the arp or rimshot. By removing the unnecessary low end in these instruments, we’re going to make way for the kick, bass and sub that occupy the frequencies below 200Hz.
Place a low cut EQ on each of these elements, and adjust the frequency cutoff to suit the frequencies within your mix. Your EQ’s audition function is useful here, so you can hear the frequency at which you’re cutting, giving you an accurate understanding of how you’re affecting the signal.
You might want to do this to any element in which the low end isn’t completely needed, for example high hats, claps, and other high frequency percussion. Just be careful not to cut too much, as the resulting sound can be thin and tinny.
Reversing gain/scale of peaks between clashing elements
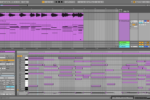
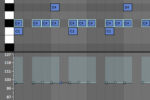
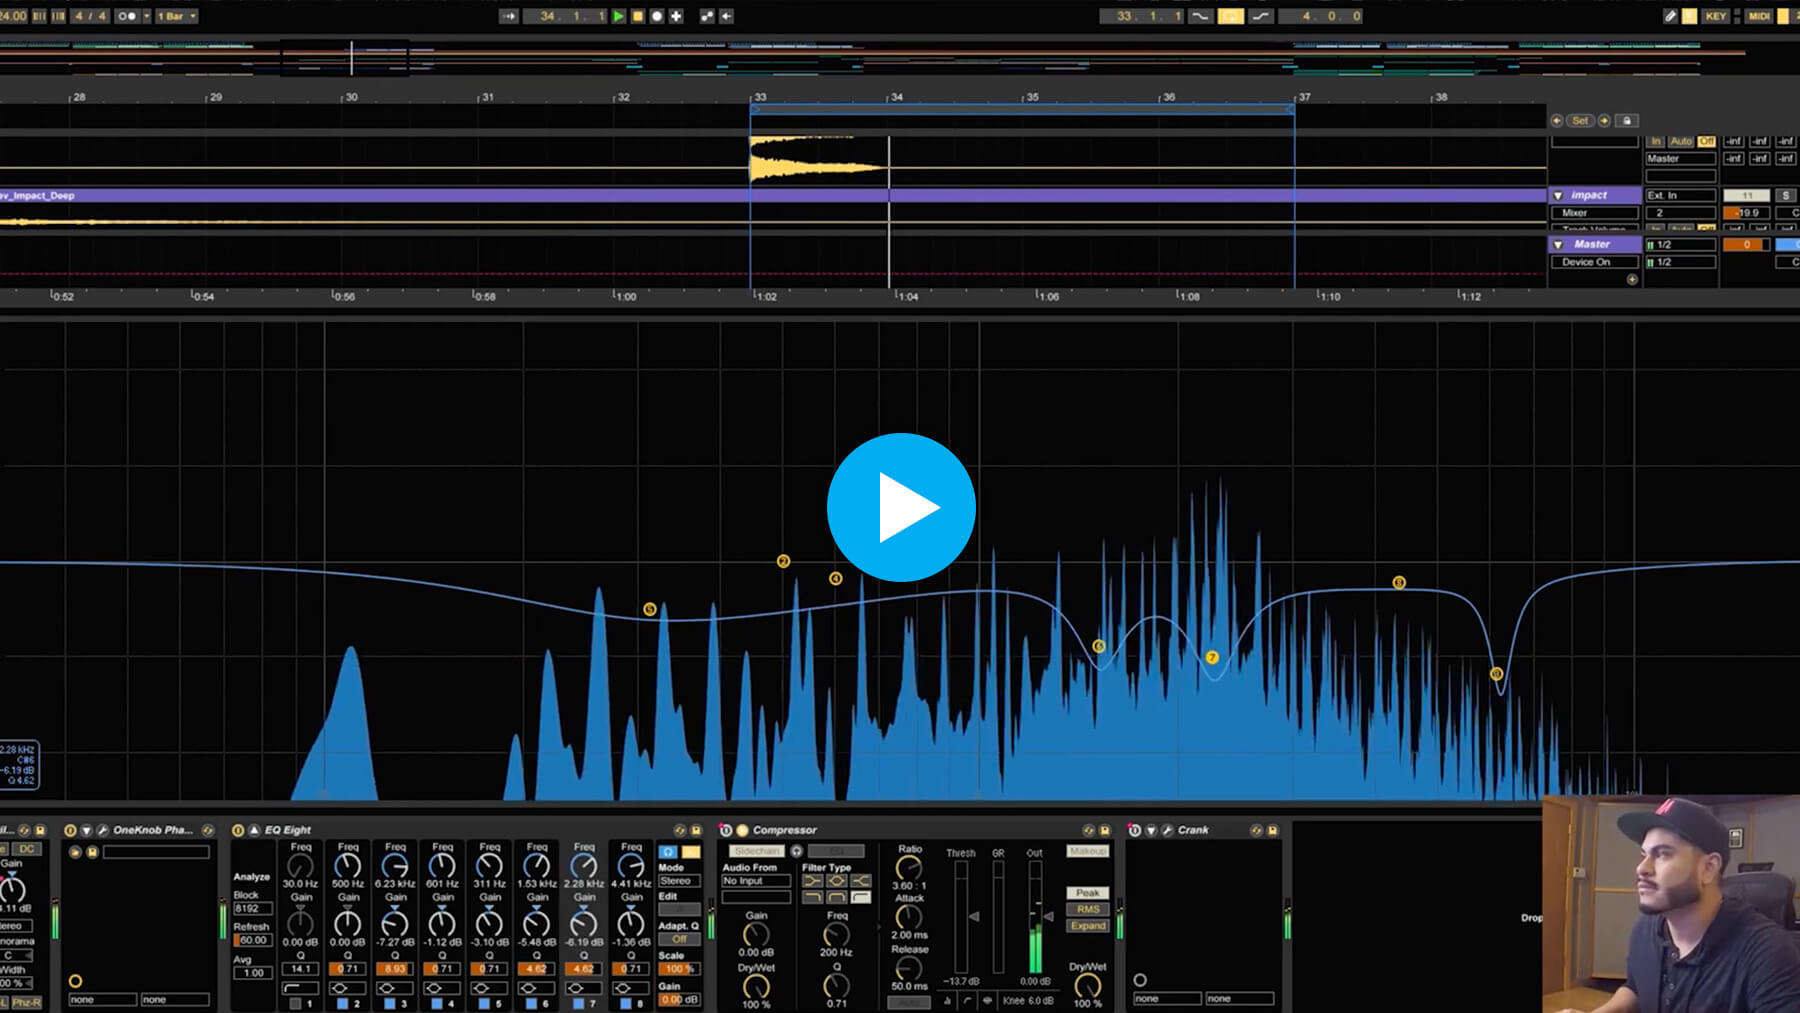
The analysis features used in the EQ plugin above can simplify the process of knowing which frequencies to cut from one track to make room for another, but the concept is the same whichever EQ you use. It’s notoriously difficult to mix your track’s low end to be dynamic and punchy, but EQ can help us to achieve that. Let’s use Ableton Live’s built in EQ Eight device to use this technique on our kick and bass.
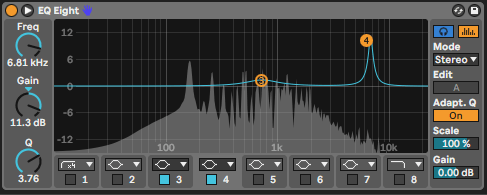
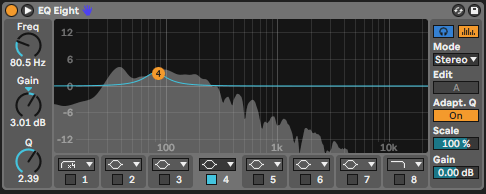
Start by placing an instance of EQ Eight on your kick, then use the analyzer to identify where the main body of the kick is. In this case, it’s around 80Hz, so we can use a small bell filter to boost this frequency range by 2dB to 3dB.
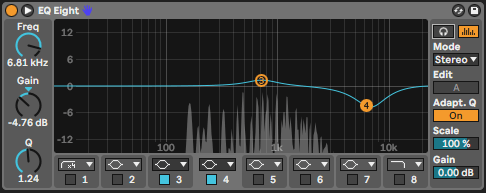
Now, copy this EQ device over to your bass and either reduce the gain of the 80Hz bell filter to a negative value, or if your plugin has this facility, you can simply invert the scale. Now, we have emphasized the main portion of our kick while carving room for it in our bass.
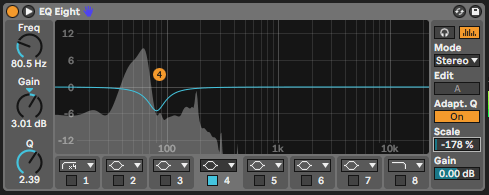
We can also do the same in reverse, so that the kick gives the bass more room in the mix.
Mid/side Audio EQ
You may have heard of mid/side processing, whereby information in the middle of the stereo signal is processed differently from information at the sides. This process is particularly useful when an audio EQ, as it allows you to make tonal alterations to your signal depending on its position within the stereo field.
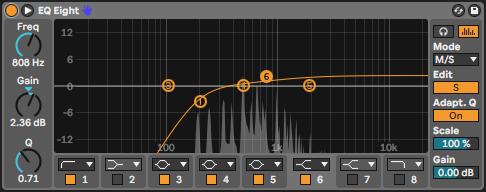
In this example, we have a recurring synth chord that occupies a lot of the frequency spectrum. We can ensure that there is now low frequency information at the side of the signal by putting the EQ in mid/side mode, selecting the side channels and cutting below around 200Hz.
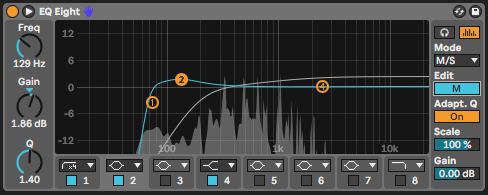
By switching to the mid adjustment mode, we can slightly increase the level of the low end around 130Hz while cutting the unwanted frequencies below 80Hz. Using this technique allows us to be more aggressive with cutting certain frequencies according to their position within the stereo field, thus giving more space to other elements that consume more of a particular frequency range.
What’s next?
If you want to give into the world of audio EQ more, check out our Science of Sound: Equalization course from FaderPro co-founder Vincent di Pasquale.