Sidechaining Vocal Effects to Get Clean, Mix-Ready Vocals
Mixing vocals is one of the trickiest parts of music production, but sidechaining vocal effects can help bring clarity to the mix
Sidechain compression is probably most known to producers as a method of separate kick drums and bass sounds, but it’s also a quick and simple method of controlling vocal reverbs and delays, leaving the dry vocal distinguishable from other effects. It’s particularly useful for situations where you want to create a reverb tail at the end of vocal phrases, without setting the vocal further back in your mix.
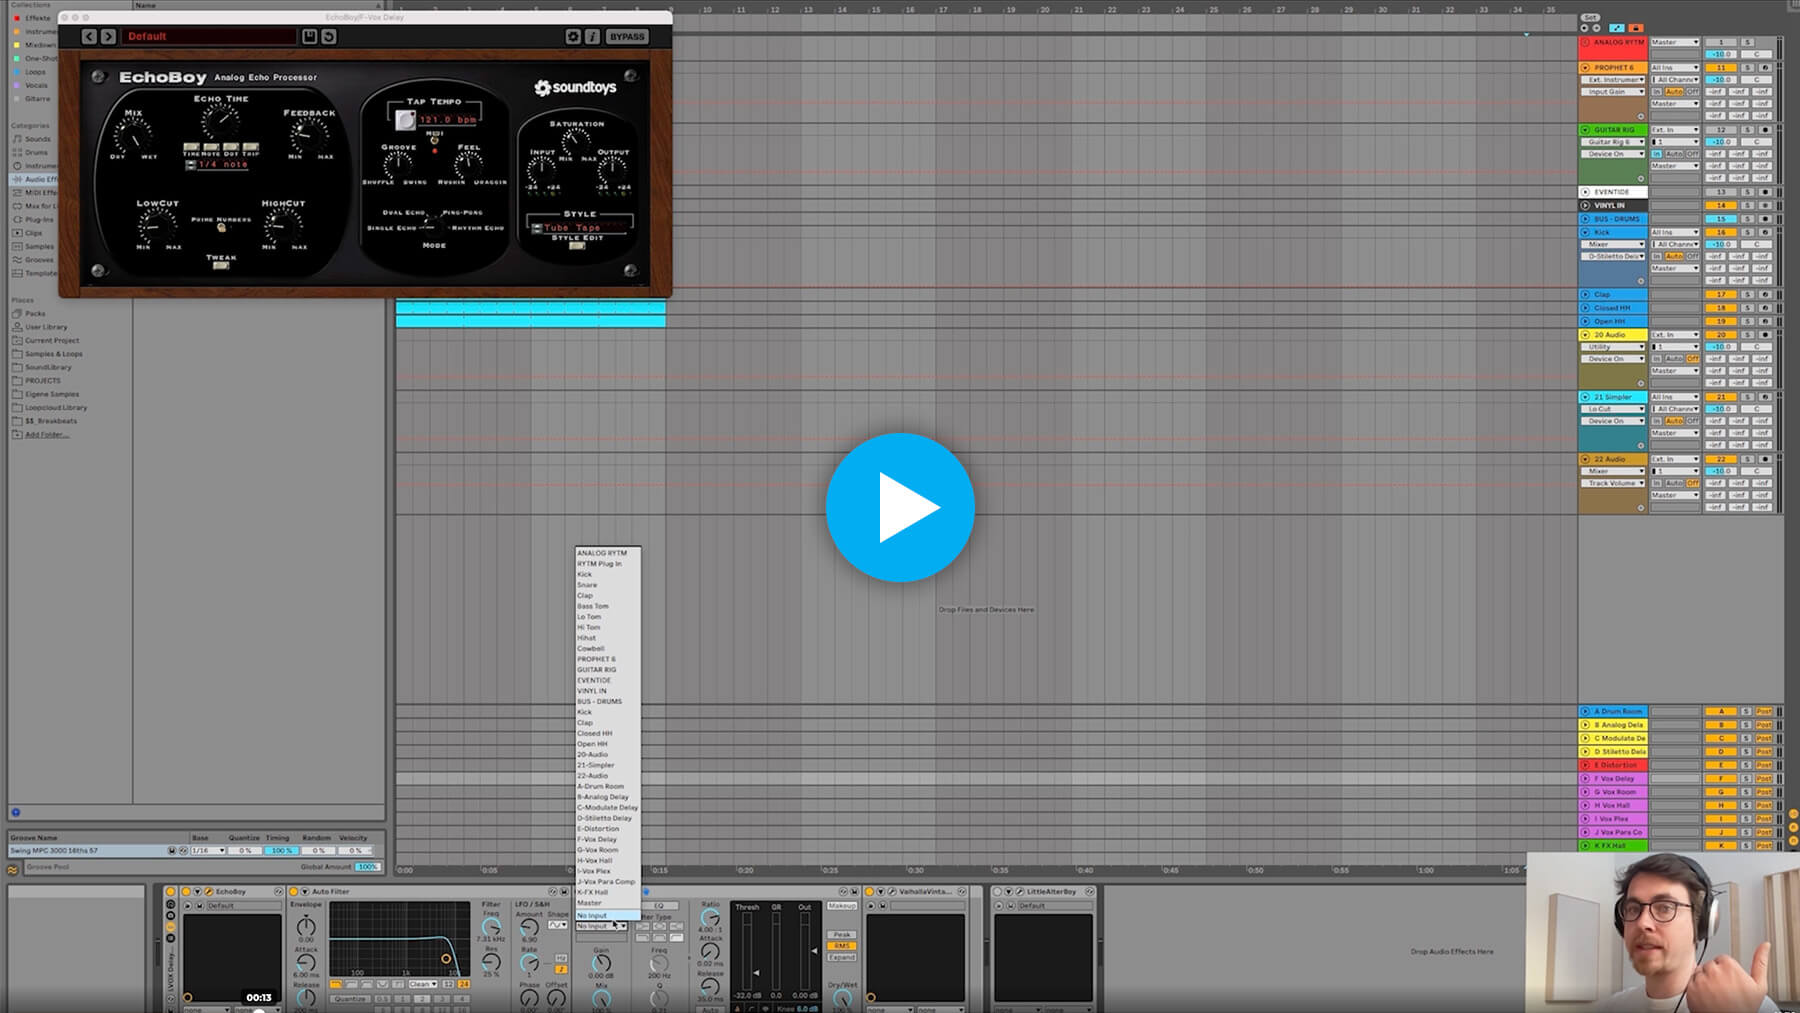
In this clip taken from his FaderPro Track from Scratch course, Wankelmut takes to Ableton to effectively illustrate vocal sidechaining by sending a vocal to a delay return, then sidechaining it to tame the delay tail.
Let’s look in more detail at how sidechaining vocal effects can help.
How to create space for your lead vocal
Let’s open up Ableton Live and take a look at how we can use this technique to give a lead vocal some space and texture, without completely washing out the whole mix.
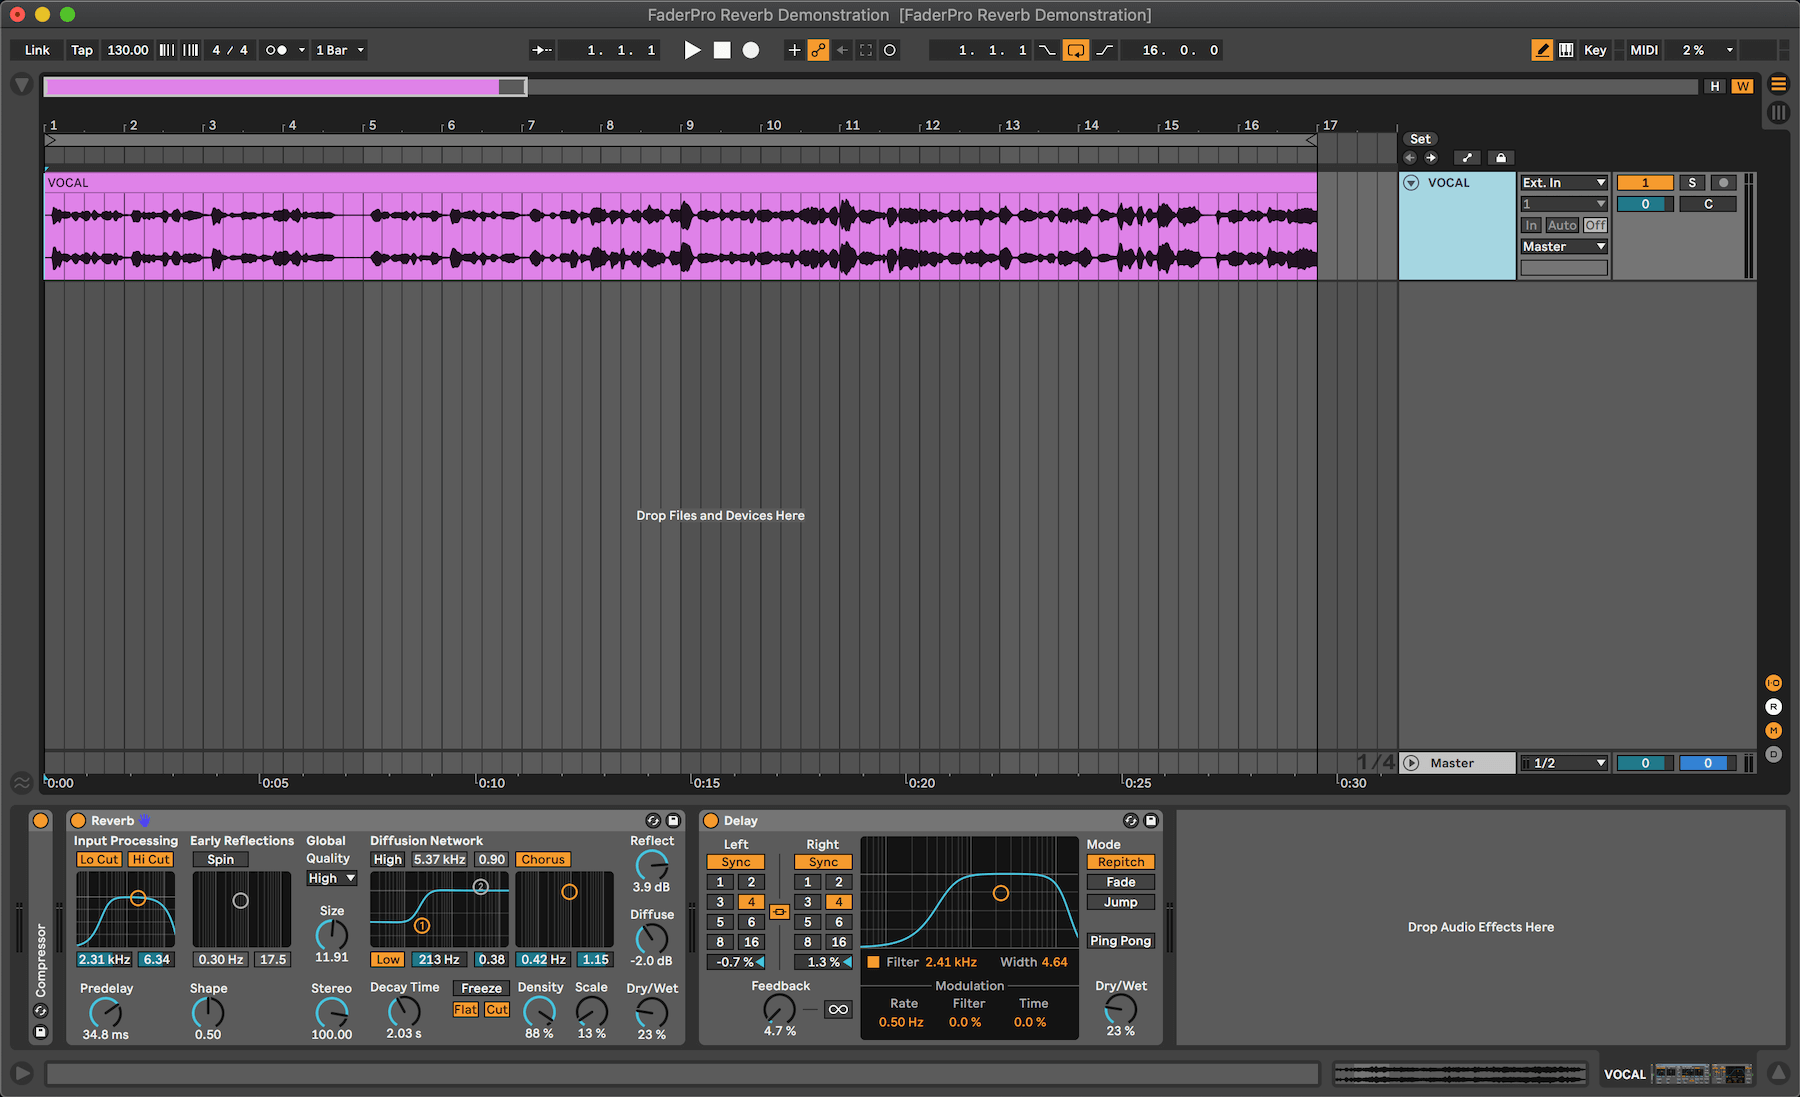
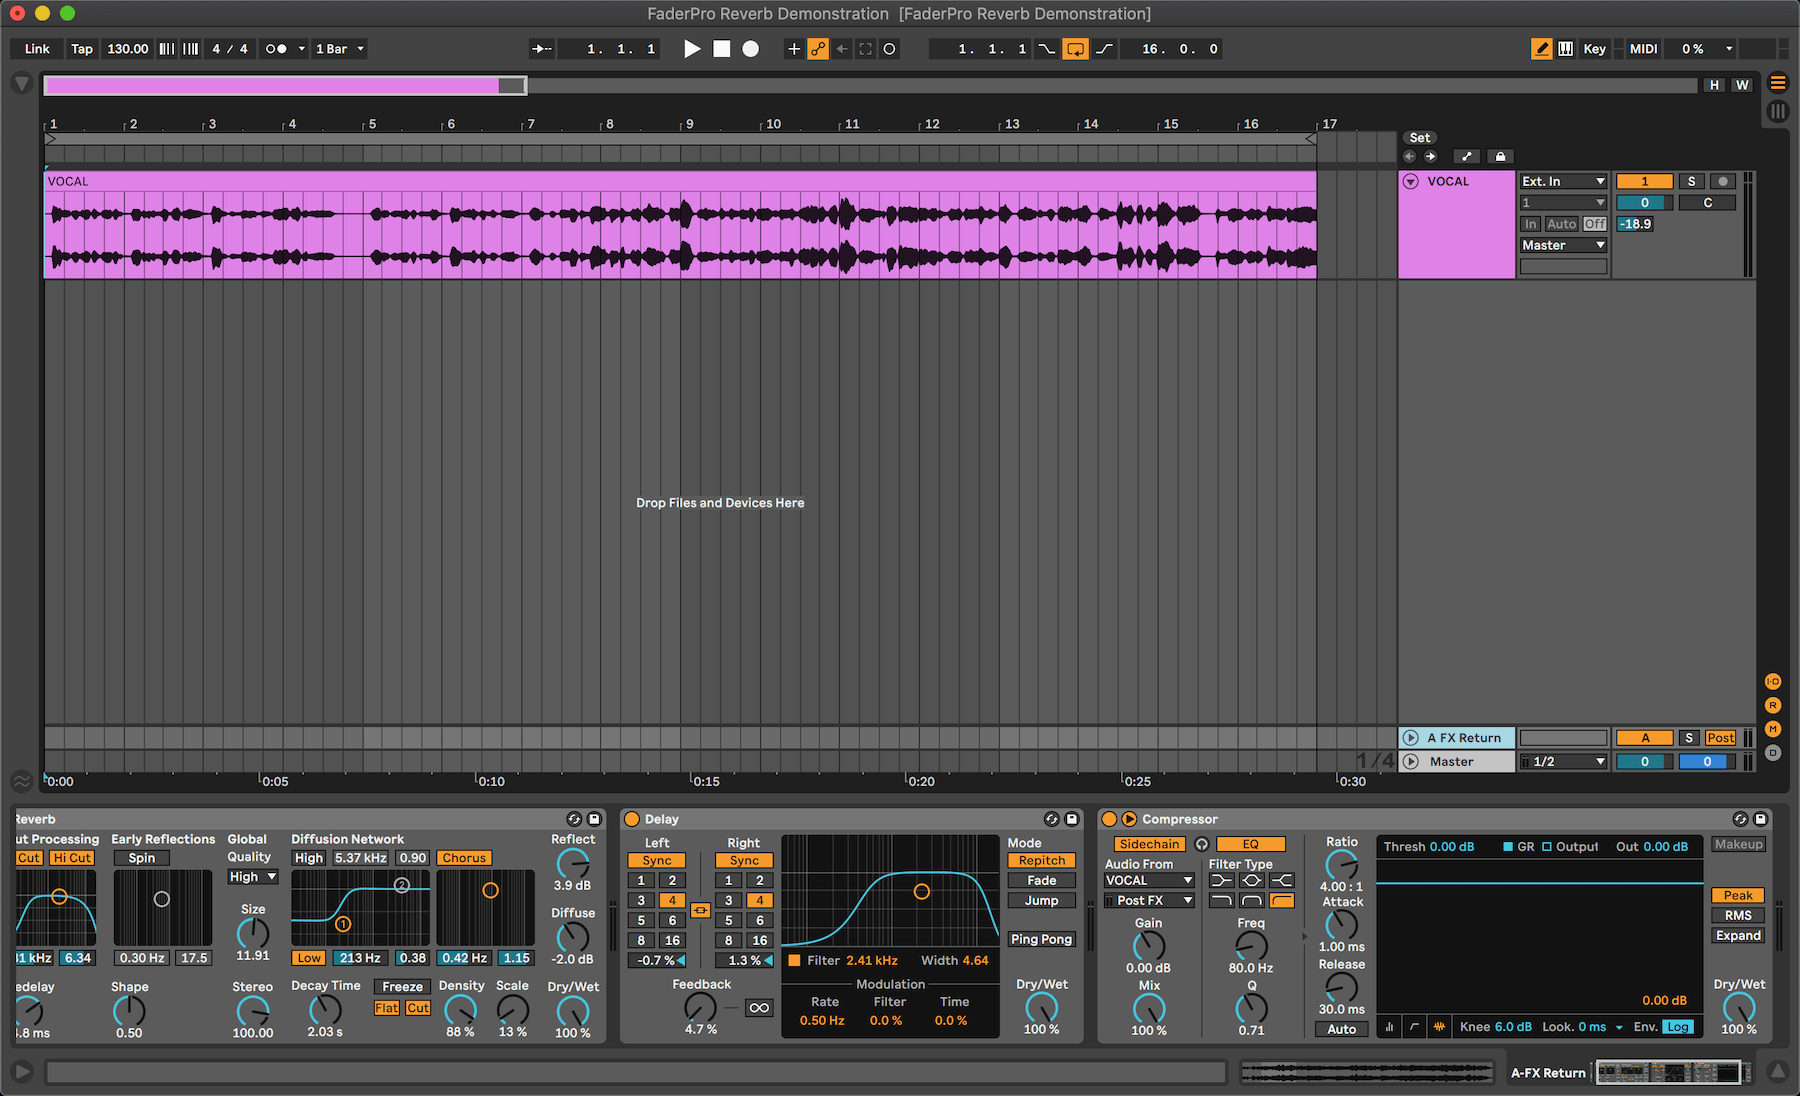
The first step is to solo your vocal and identify the effects you wish to tame. In this case, there are reverb and delay effects directly on the vocal channel as an insert, which are throttling the dynamics and clarity of the dry vocal despite the Dry/Wet amounts being set relatively low.
Send your vocal effects
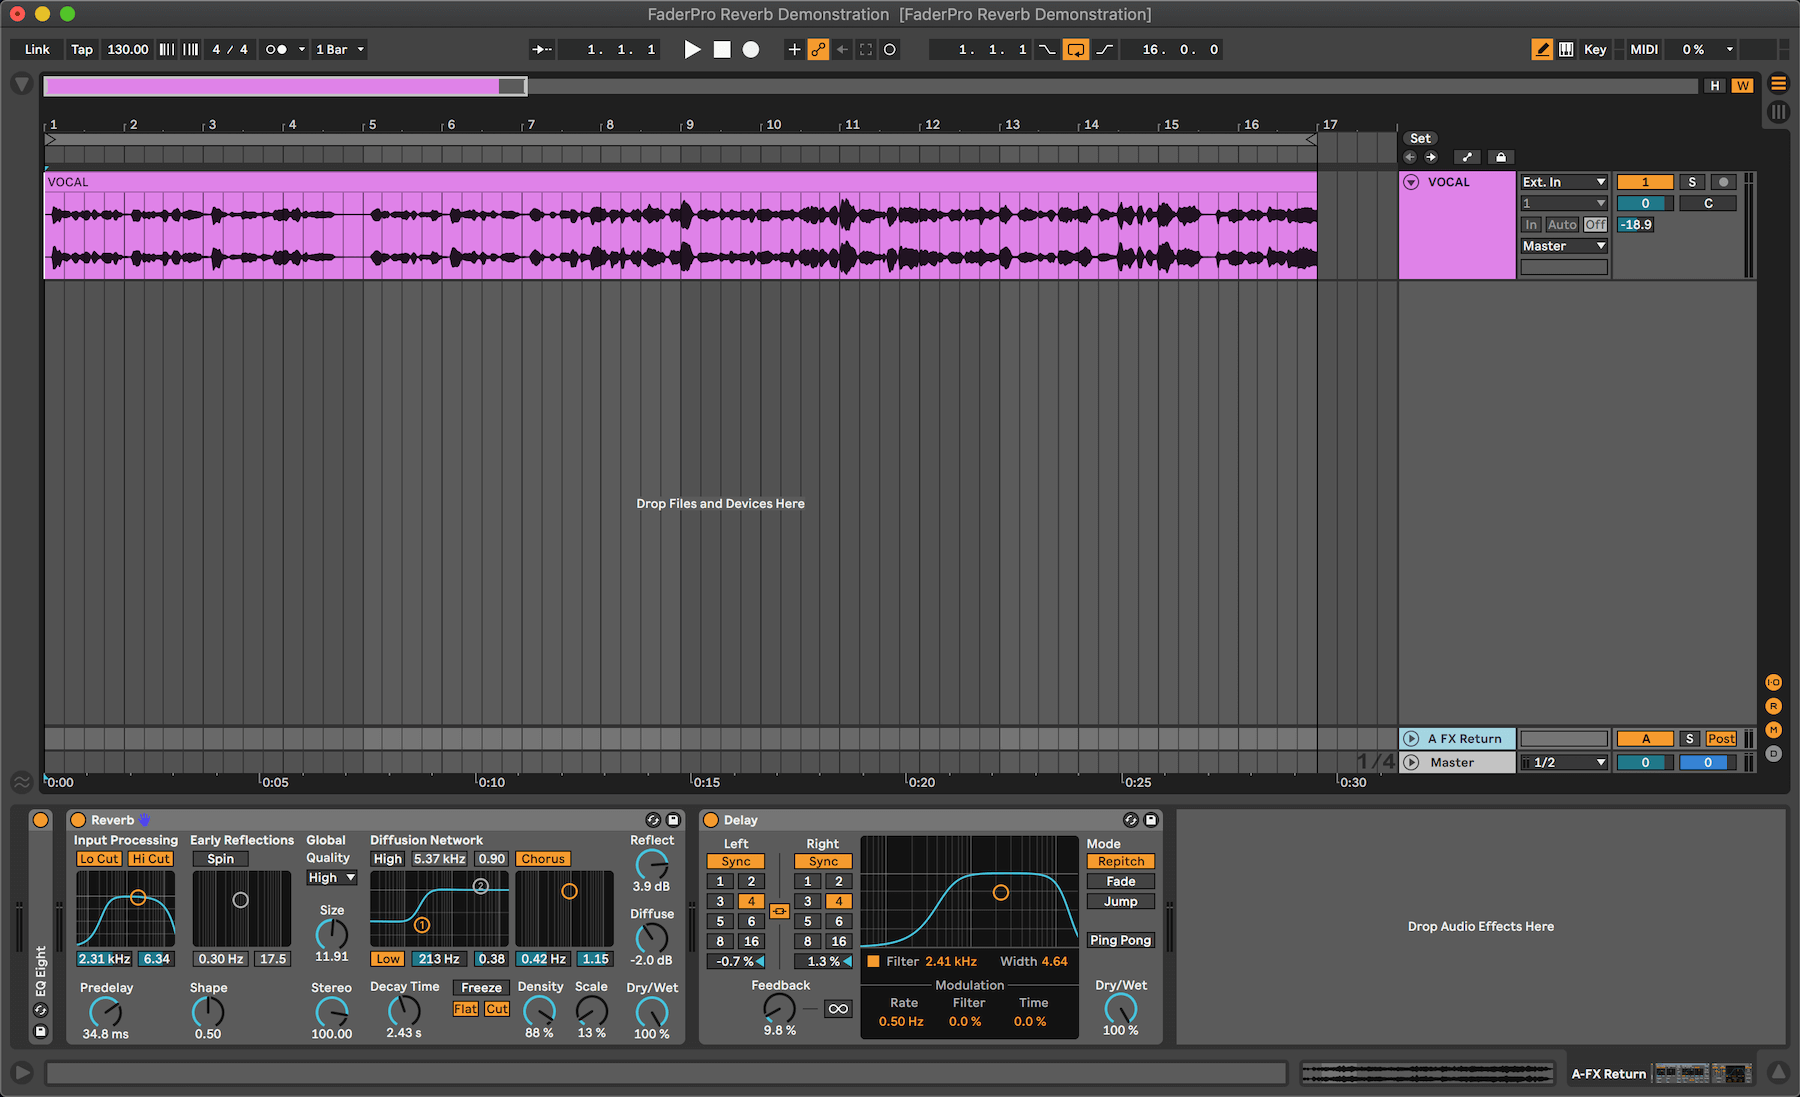
Moving these effects to a new return channel gives you more control over the dry and wet vocals, enabling you to process both parts independently.
Because the effects are now running in parallel on a send instead of in serial on a channel, turn the reverb and delay’s Dry/Wet amounts up to 100%, and use the vocal channel’s send amount to control how much of the wet vocal you want to hear.
Now, your vocal should sound similar to how it did before.
Set up vocal sidechain compression
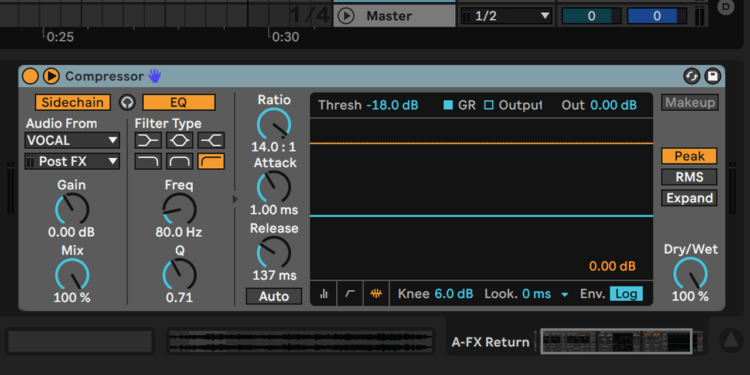
After dialling in the channel’s reverb send amount to taste, add your choice of compressor after the reverb. Any compressor will do the trick, provided it has a sidechain input.
Next, engage the sidechain and select the dry vocal as the sidechain source. In this example, we’re using Ableton Live’s stock Compressor device.
Find the right balance
Now you can start to adjust the compressor settings to achieve the desired effect. Begin by bringing the threshold down until most of the dry vocal is engaging the compressor, then increase the compression ratio until you feel the wet return channel is sufficiently ducking out of the way of the dry vocal.
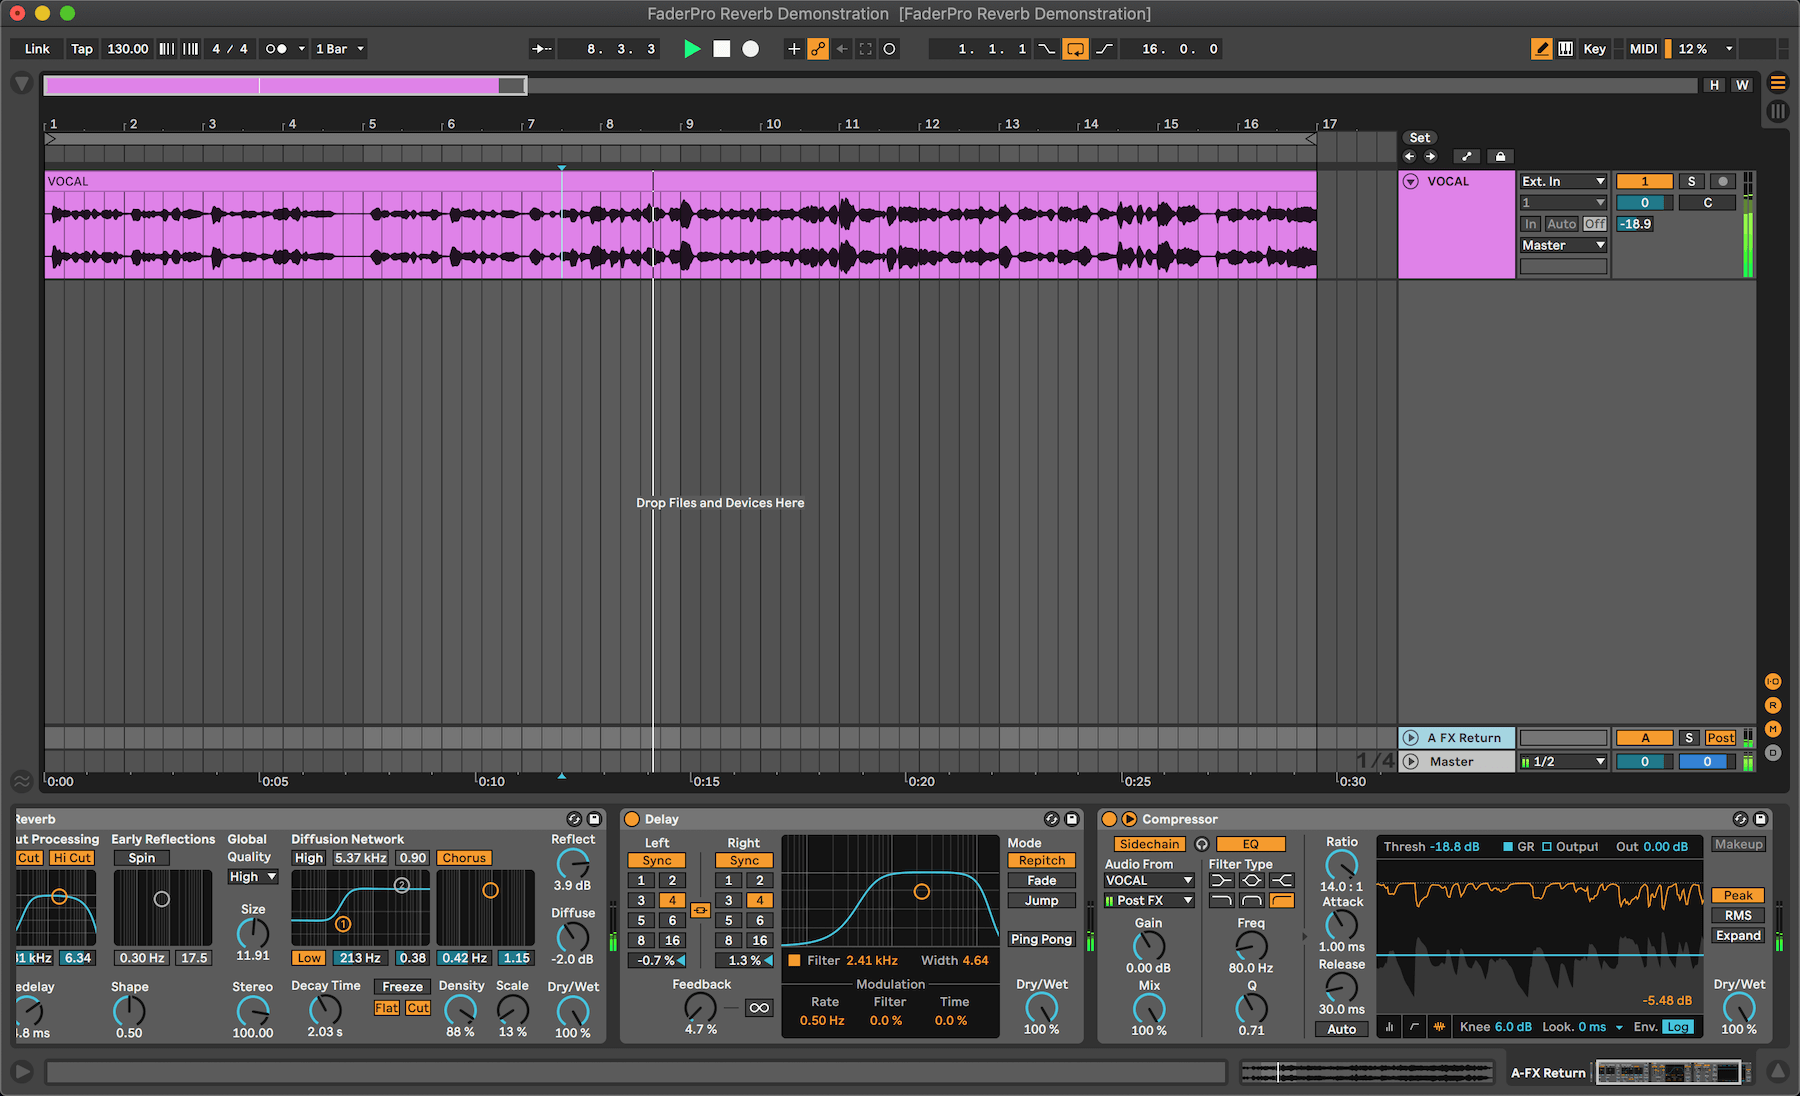
Use the compressor’s attack and release parameters to fine tune the compression to work with the tempo, flow and cadence of your vocal. The idea is to have the vocal effects fill the gaps between syllables and phrases. Faster styles of music with quick vocal delivery, such as rap, may require fast release times.
On the other hand, songs with slower and more drawn out vocal phrases like those heard in power ballads will require slower release times.
In this case, the vocal in this example is somewhere in the middle. We’ve adjusted the compressor’s release time so that gaps between words are filled, without them sounding lumpy or jarring to the listener.
“It is good practice to use a short attack time when applying compression to any sound.”
Regardless of the style of music or pace of vocal delivery, it is good practice to use a short attack time when applying sidechain compression to any sound – and particularly when sidechaining vocal effects. This way, the sidechain source can quickly trigger the compressor to clamp down on the affected signal.
Add further processing
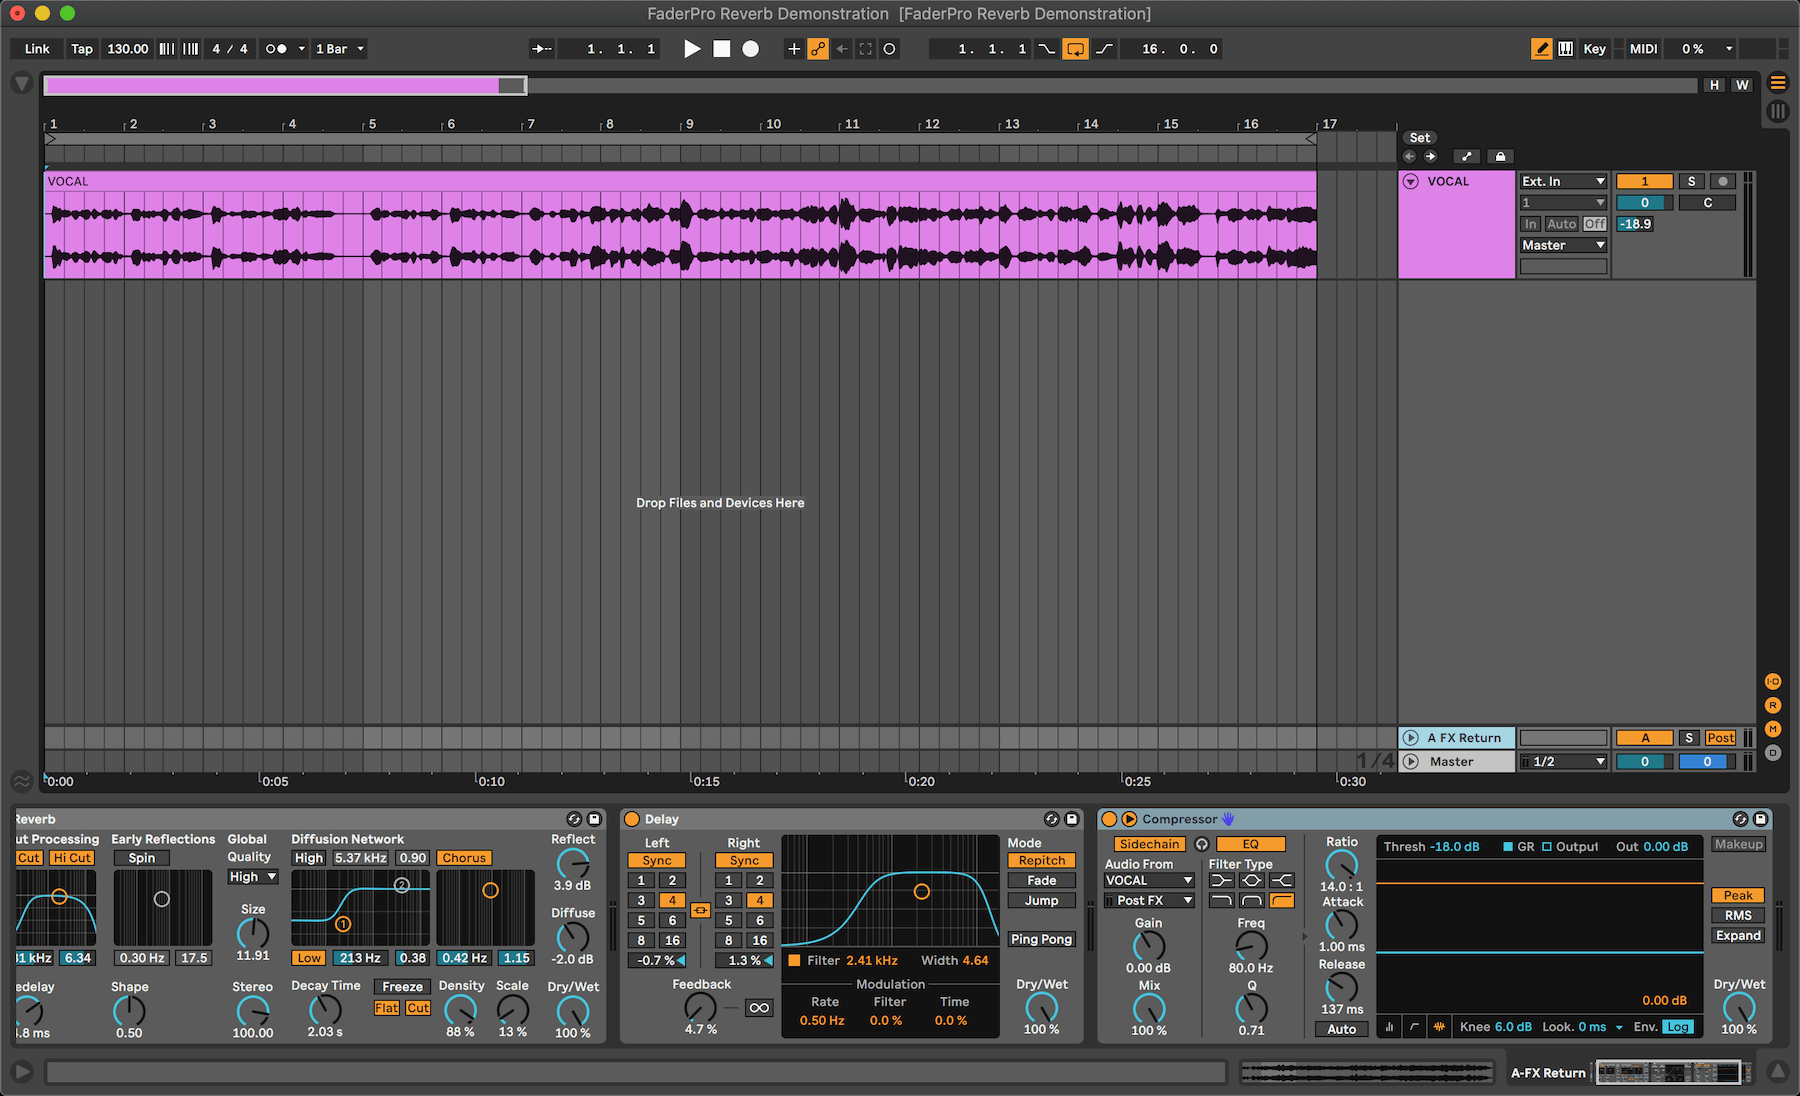
A further benefit of this approach to sidechaining vocal effects is that you have control of the vocal effect channel’s volume independent of the dry vocal. This means you can add further processing to the vocal, experiment with its stereo field or add automation that signifies new sections of the song.
You can try this music production technique on any number of instruments, for example melodic elements with big delay effects, or drums with spacious reverbs.
As is often the case with music production, there is not one fixed setup that is suitable for every scenario. While these pointers may serve as a great place to start, it’s important to critically listen to what is happening with your dry and wet channels, and make appropriate adjustments.
Listening to the channel you are applying effects to within the context of your whole mix will help you to hear how these elements are interacting with other parts of the composition.
Checking the return channel in solo can be useful for giving you an idea of how your compression is altering your sound, but ultimately you need to listen to the effect within the mix to truly understand how it’s affecting your overall mix.
Next steps
If you’re looking for more music production tips, check out Wankelmut’s full course where he takes you through his entire production process.
Or check out any of the free music production courses or Studio Short lessons where you can boost your music production skills in 20 minutes or less.