Using Logic Pro’s Flex Mode to Repitch Samples
If you’re struggling with pitch shifting your samples in Logic Pro, Flex can help
Pitch transposition is a great way of repurposing samples and giving them new life in your productions, whether you’re reworking a vocal to fit a certain key, repitching a drum sample to find the right percussive character, or twisting a whole piece of audio into the hook for your new tune. When sampling first became a thing, hardware samplers were kitted out with pitch-shifting capabilities, and modern software samplers within your DAW can do the same and much more.
Apple’s flagship DAW Logic Pro comes equipped with Sampler, a full-blown stock sampling instrument that can handle repitching samples with ease. However, pitch adjustments can often result in unwanted changes to the tempo of your samples, but not with Logic Pro’s Flex mode. Flex can be used both within Sampler and to give you control over your samples, and here’s how to do it.
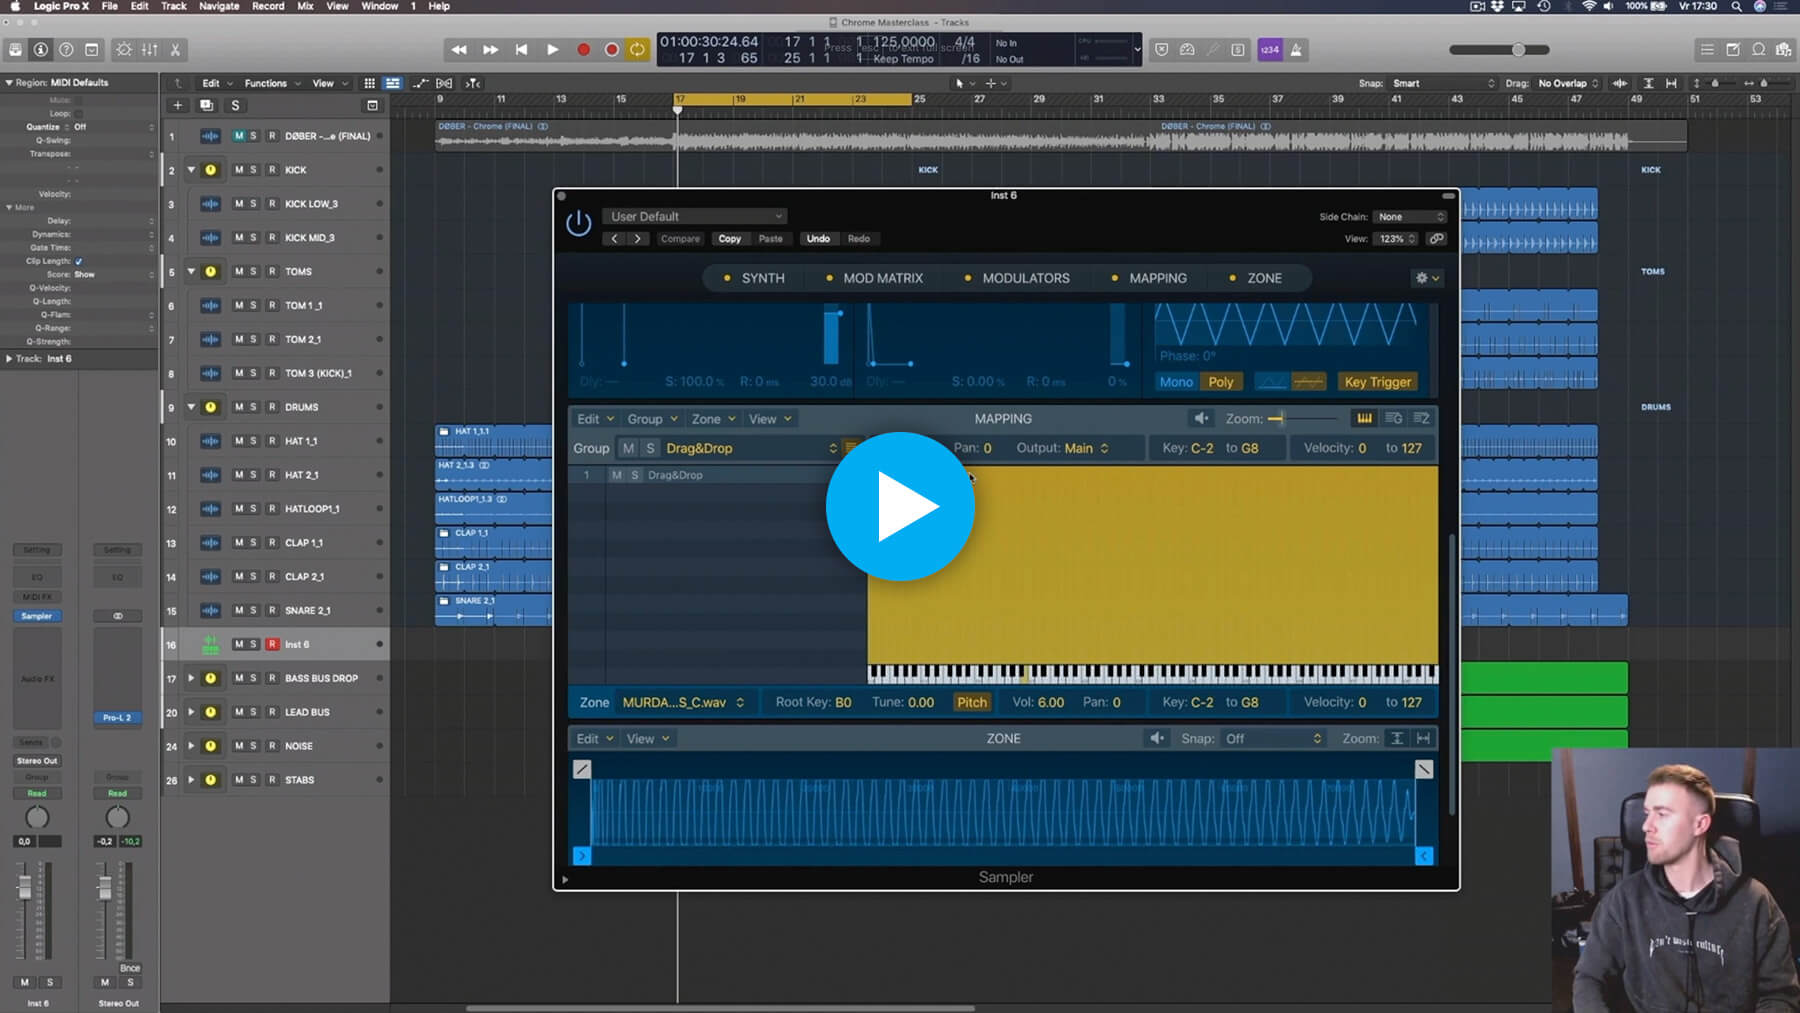
But before you start reading, check out this clip from producer and DJ DØBER’s Track from Scratch course, in which he shows how easily you can repitch samples using Flex mode within Logic Pro’s Sampler.
Working with Flex inside Sampler
Logic Pro’s Sampler is a sophisticated software sampler with which you can quickly create multisample instruments using a drag-and-drop workflow. Creating a sampler instrument is easy, and can be accomplished in two ways.
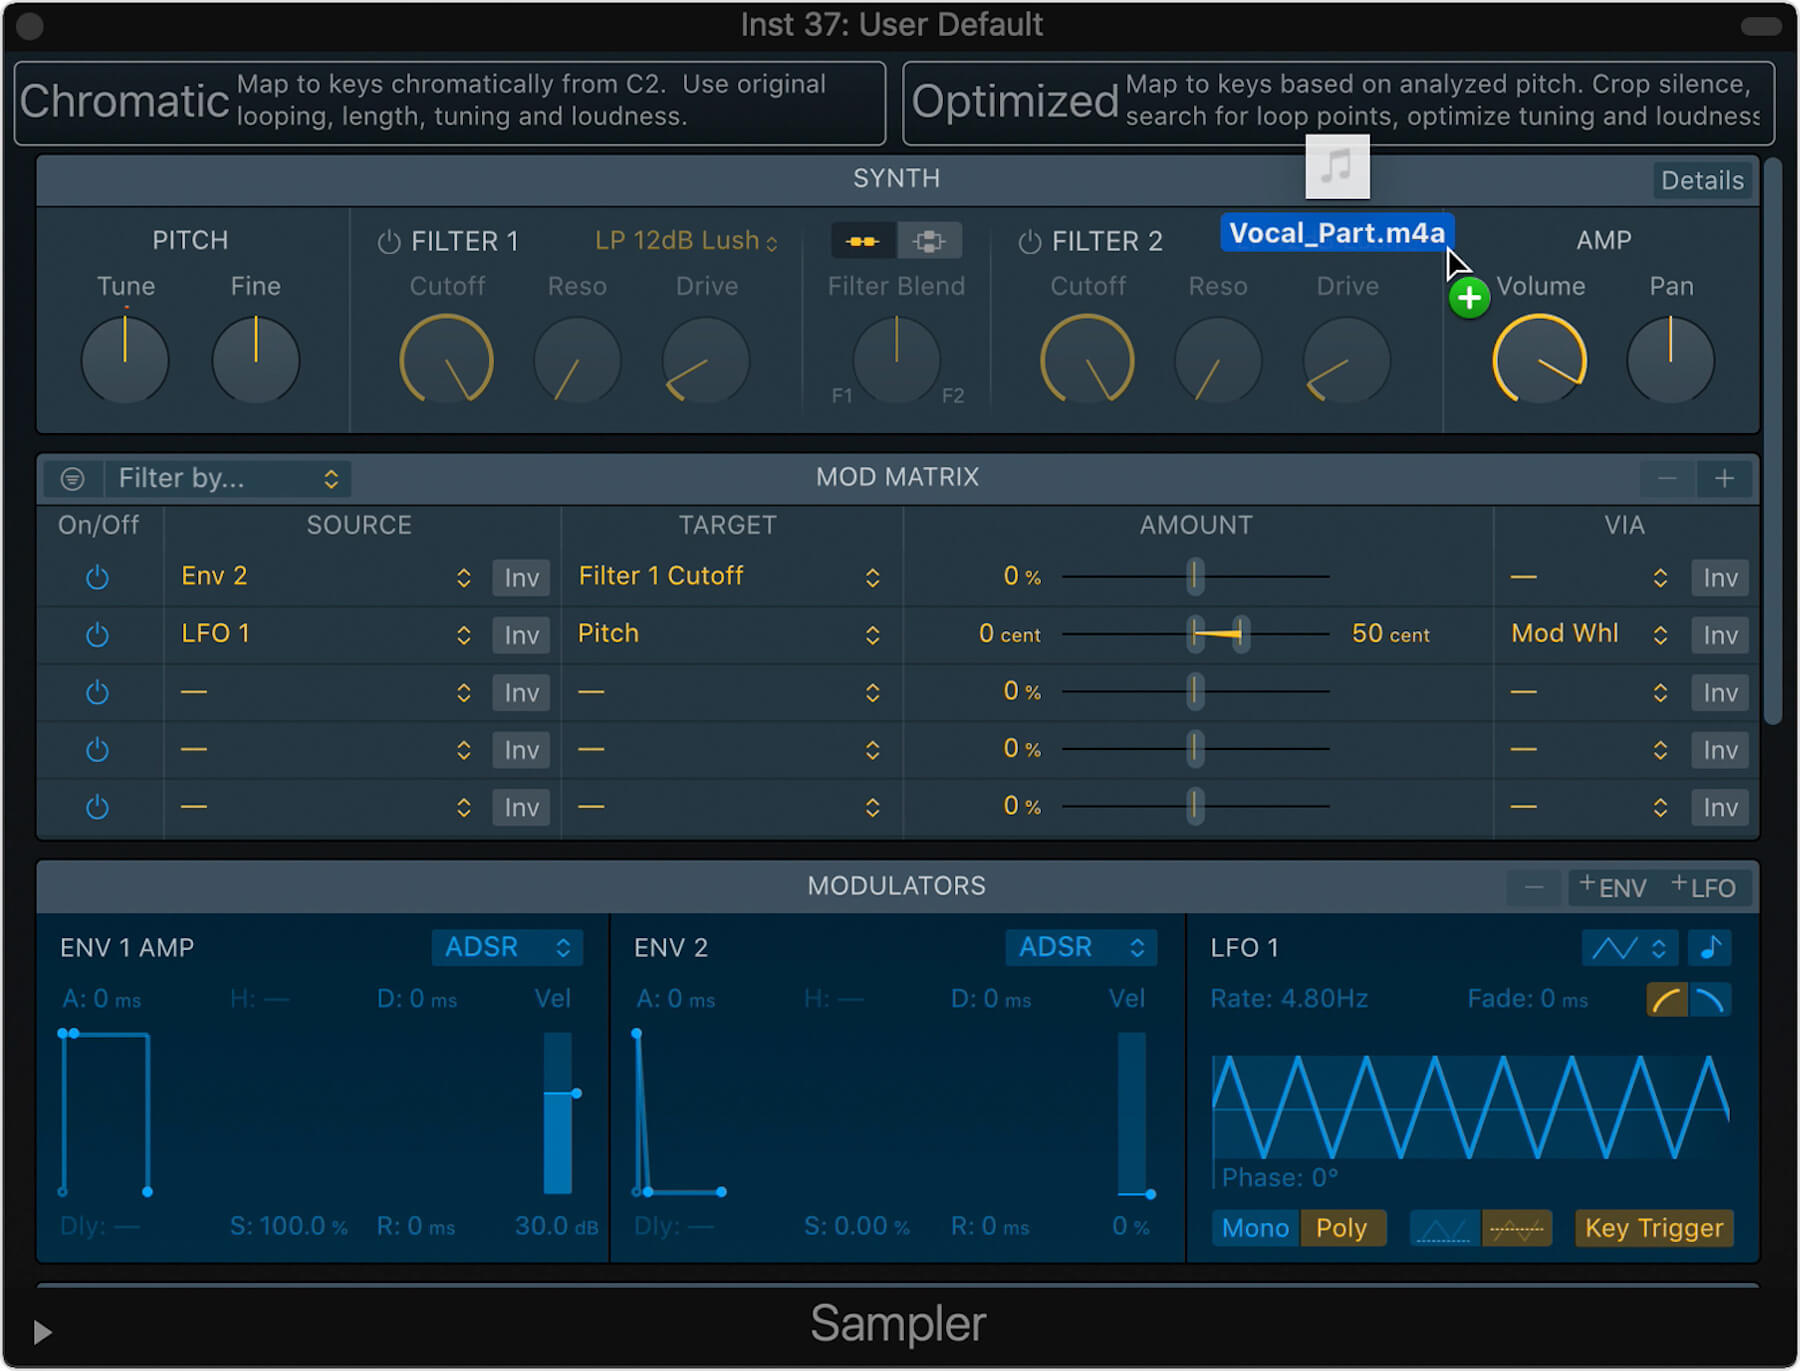
The first way is to create a software instrument track with Sampler as the instrument. Then, open up Sampler and drag a sample to one of the import options in the Navigation Bar. Chromatic mode will map to keys chromatically from C2 on the keyboard, which is useful for experimenting with pitch using MIDI. Optimized mode intelligently maps to keys based on analyzed pitch, which is ideal for pitched instrument samples or vocals.
The second method is to drag a sample directly into Logic Pro’s track header area, and choose to create a new track using Quick Sampler.
Once you’ve loaded a file into Sampler, you have a choice of three processing modes: Classic, One Shot and Slice. Each has their own distinct sampling mode, which we won’t go into here – the main thing is that Flex is available for each. Ableton’s Simpler has a similar set of modes, which we explain in our Ableton Simpler: Classic vs one-shot vs slice mode article.
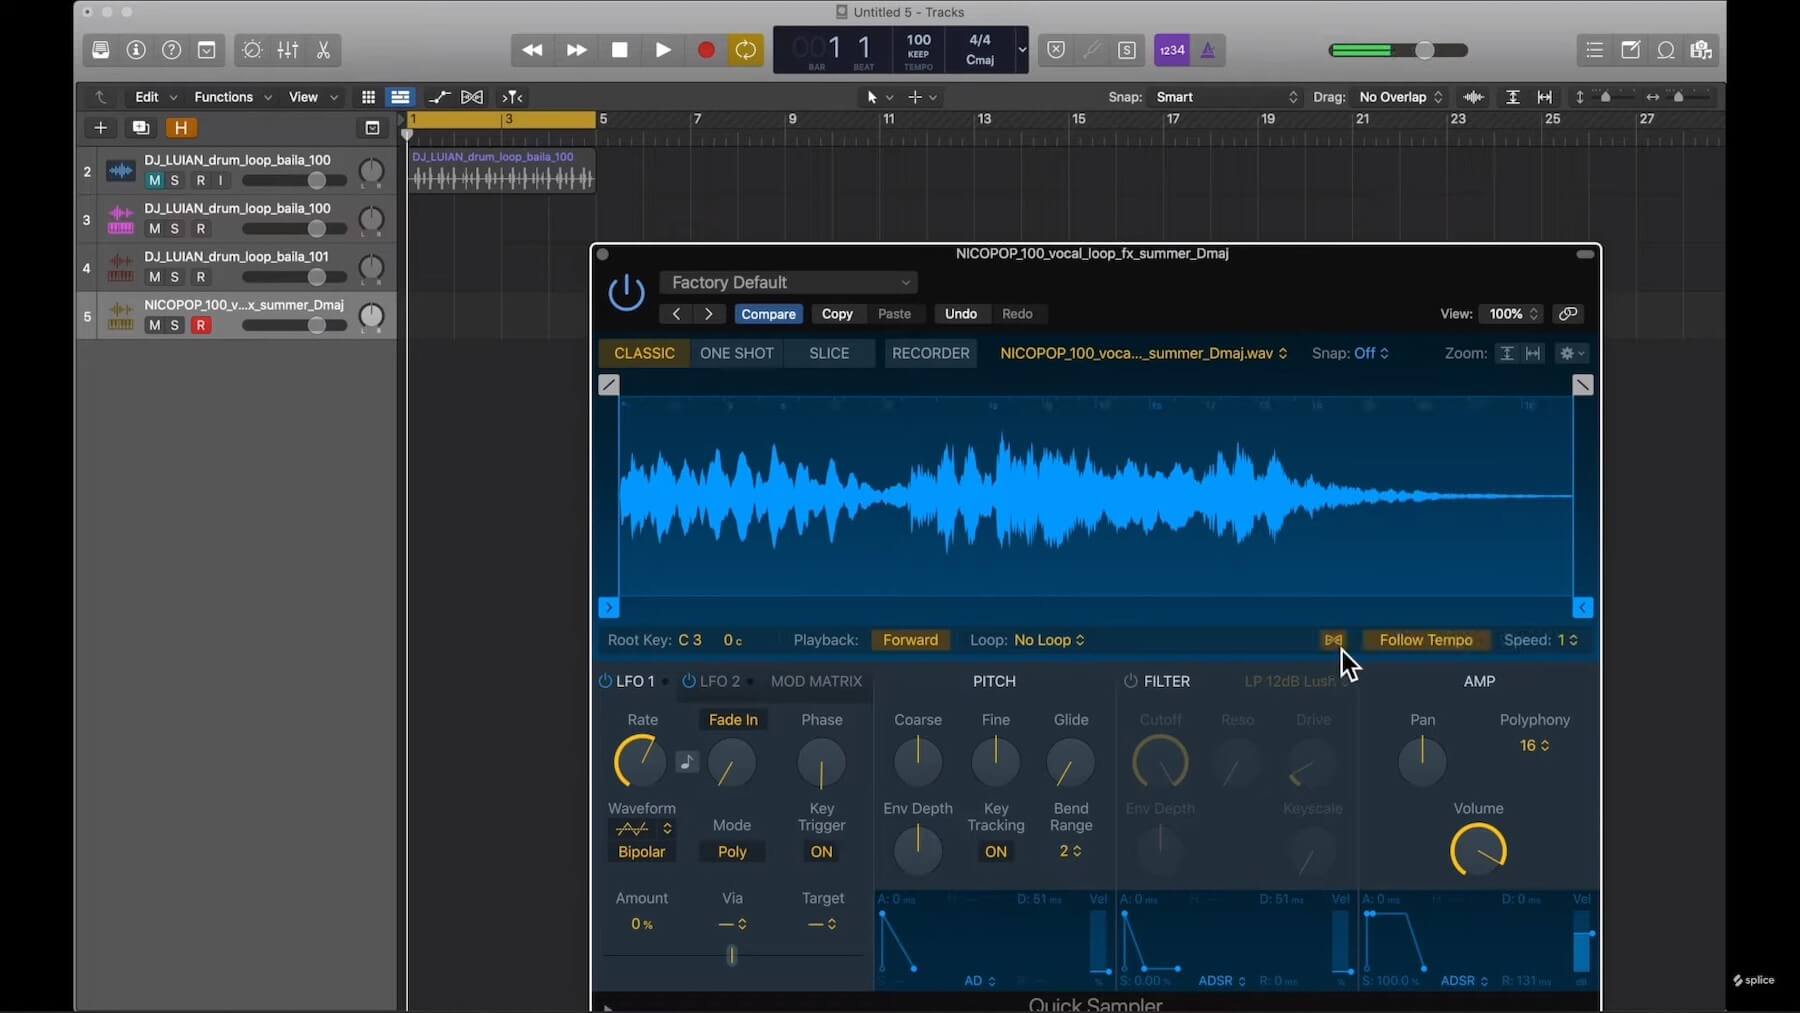
The Flex button (the icon that looks like a warped track) can be found underneath the waveform visualiser, beside the Follow Tempo button. Without Flex switched on, Sampler will change the tempo of the sample when you play it at a different pitch. With Flex on, regardless of which key you play, the sample will stay at its original length. Keep in mind that the more drastic the pitch change, the more artefacts will be introduced to the sample.
How to use Flex Pitch on Logic Pro tracks
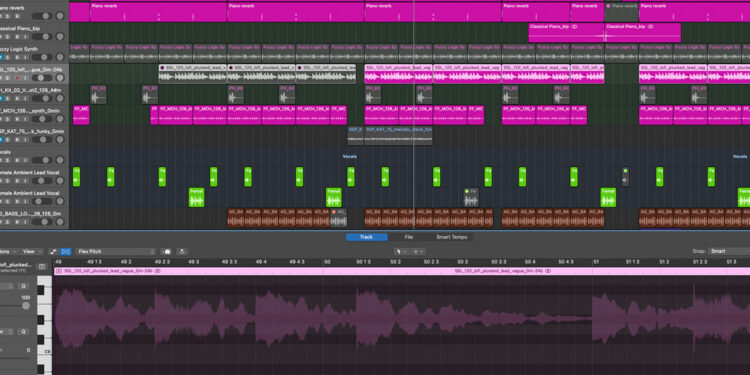
As well as using Flex within Sampler, you can use it to transpose sections of audio in Logic’s Arrangement view. First things first, you’ll need to make sure Flex is turned on. There are two ways of doing this: Either turn on Flex globally in the Arrangement view by clicking the icon that looks like a warped track beside the Functions and View menus, or double click your sample and click the same icon in the Track view.
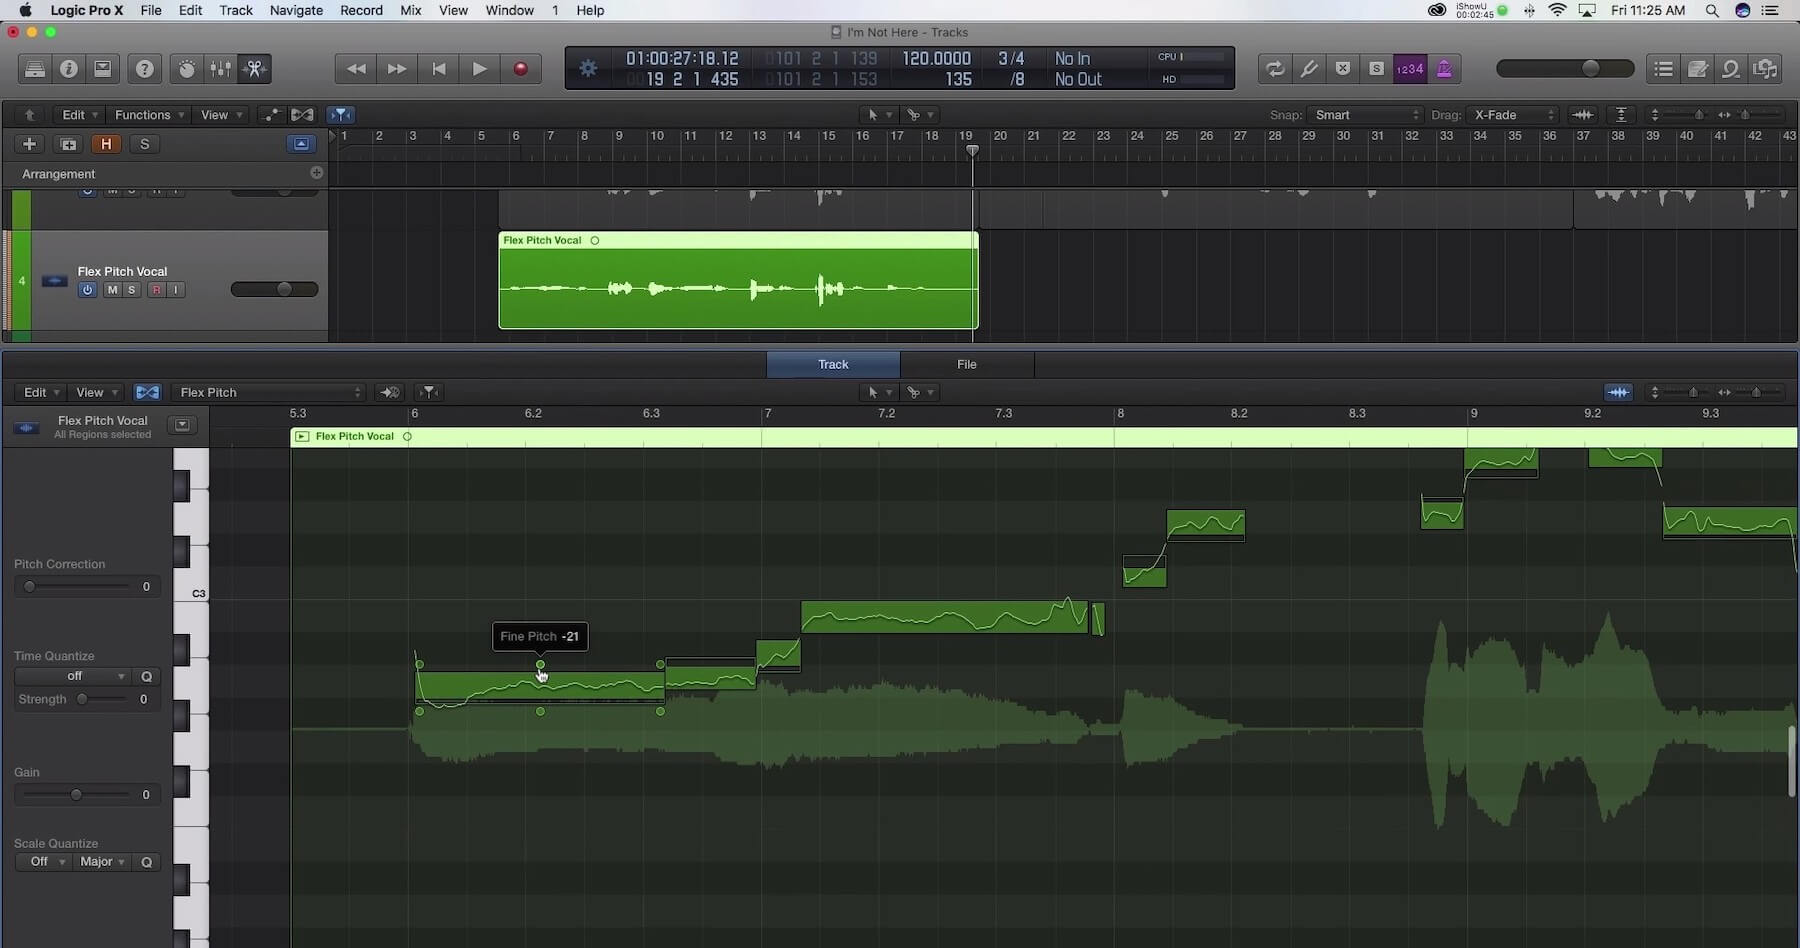
With Flex enabled, open up the Flex menu and choose Flex Pitch. Once this has been selected, your audio file will appear as a range of blue rectangles which correspond with the note being sung or played, similar to how MIDI is laid out. You can adjust the pitch of a note by dragging it up or down, as well as affecting parameters like Gain, Vibrato and Pitch Drift.
Other ways of pitch shifting audio in Logic Pro
As well as Logic Pro’s Flex mode, it’s worth noting that there are a number of other methods of repitching samples in the DAW. They might not offer the same flexibility as Flex Pitch, but sometimes all you need is a quick solution.
You can quickly repitch samples by clicking on the audio clip and hitting Option + Up/Down (Mac). Once you’ve done this, you’ll see a plus or minus number appear on the audio clip, to reflect how many semitones you’ve pitched the sample either up or down.
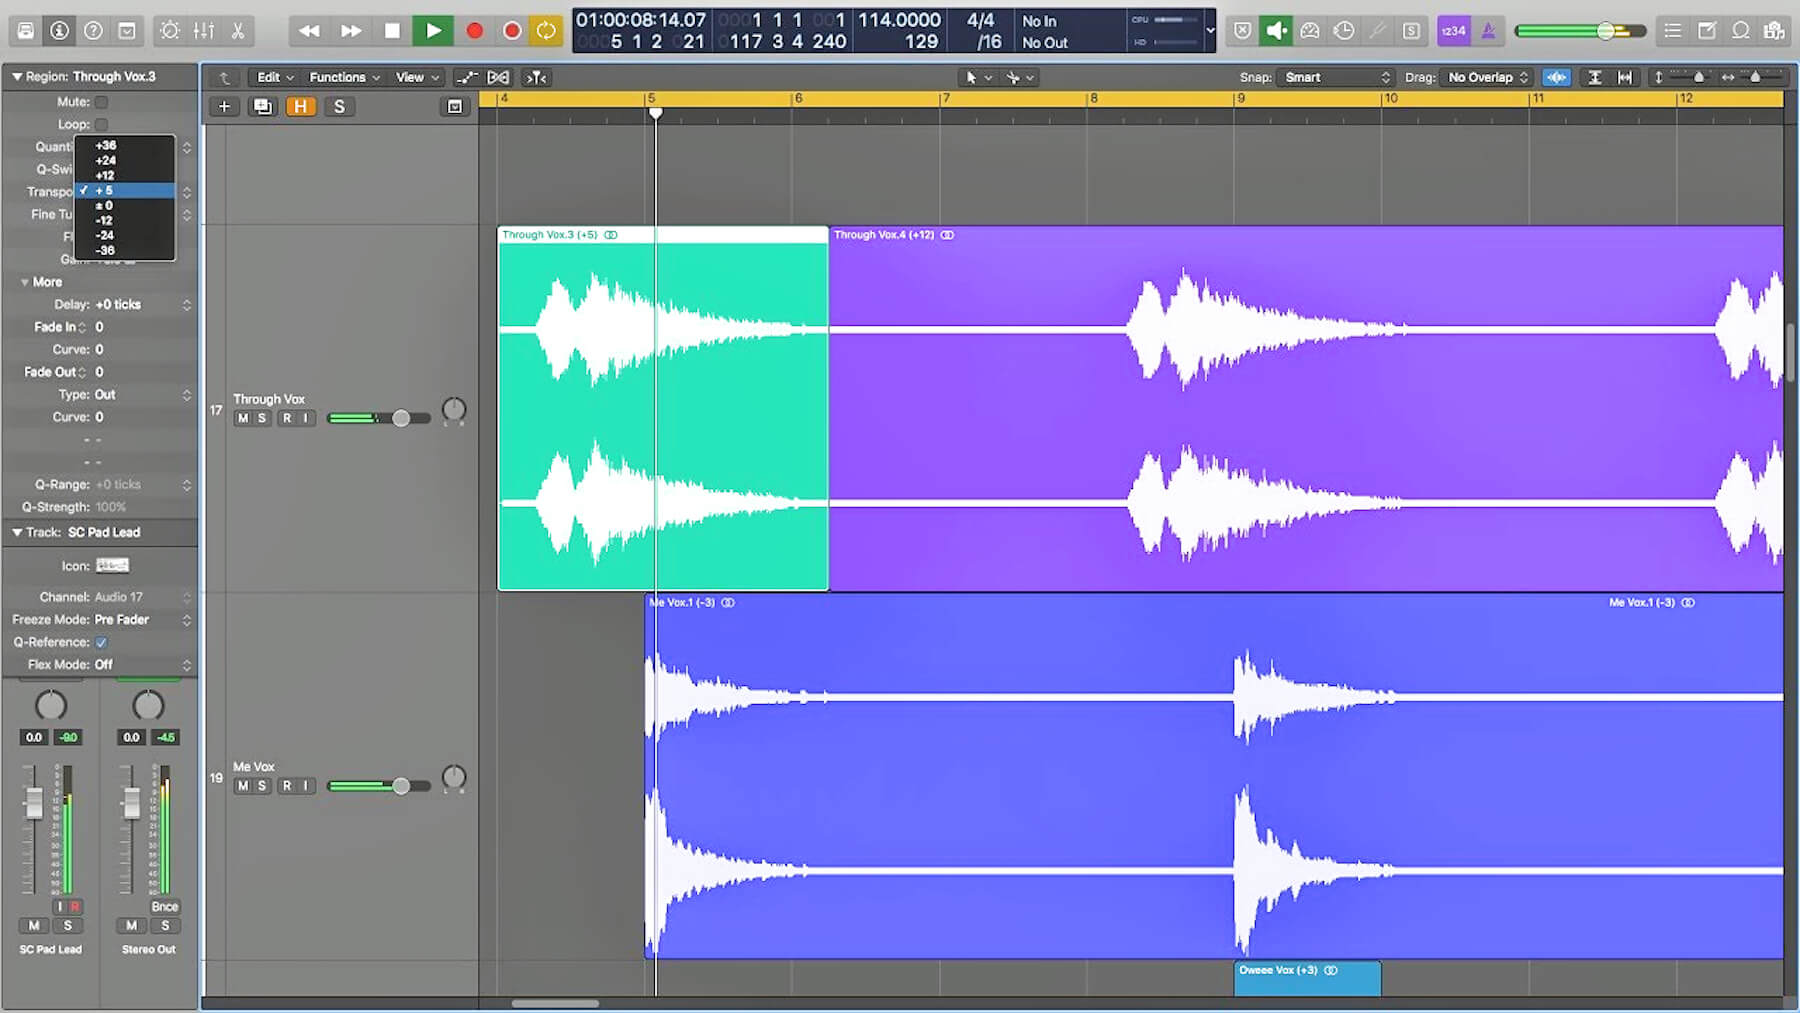
Another method is to click the audio clip, and open up the Region menu in the top left of Logic Pro. Here, you’ll find a Transpose box. Click the box and then drag your mouse up or down to repitch the sample. The upper and lower limits of this tool are 36 semitones.
Using Logic Pro’s Time and Pitch Machine
A third way of changing the pitch of a sample in Logic Pro is to click on the audio file, and in the File window at the bottom of the screen, click on the Functions menu. From here, open up the Time and Pitch Machine.
Before you repitch anything, you have a choice of algorithms to best suit your sound source, with the default being Universal. For drums or percussion the Beats and Percussion algorithms are your best bet, while the Pads and Complex settings prioritise smooth pitch-shifting. Aside from this, there’s a choice to be made between Free mode, in which pitch and tempo can be changed independently of one another, and Classic mode, which increases pitch as you increase tempo.
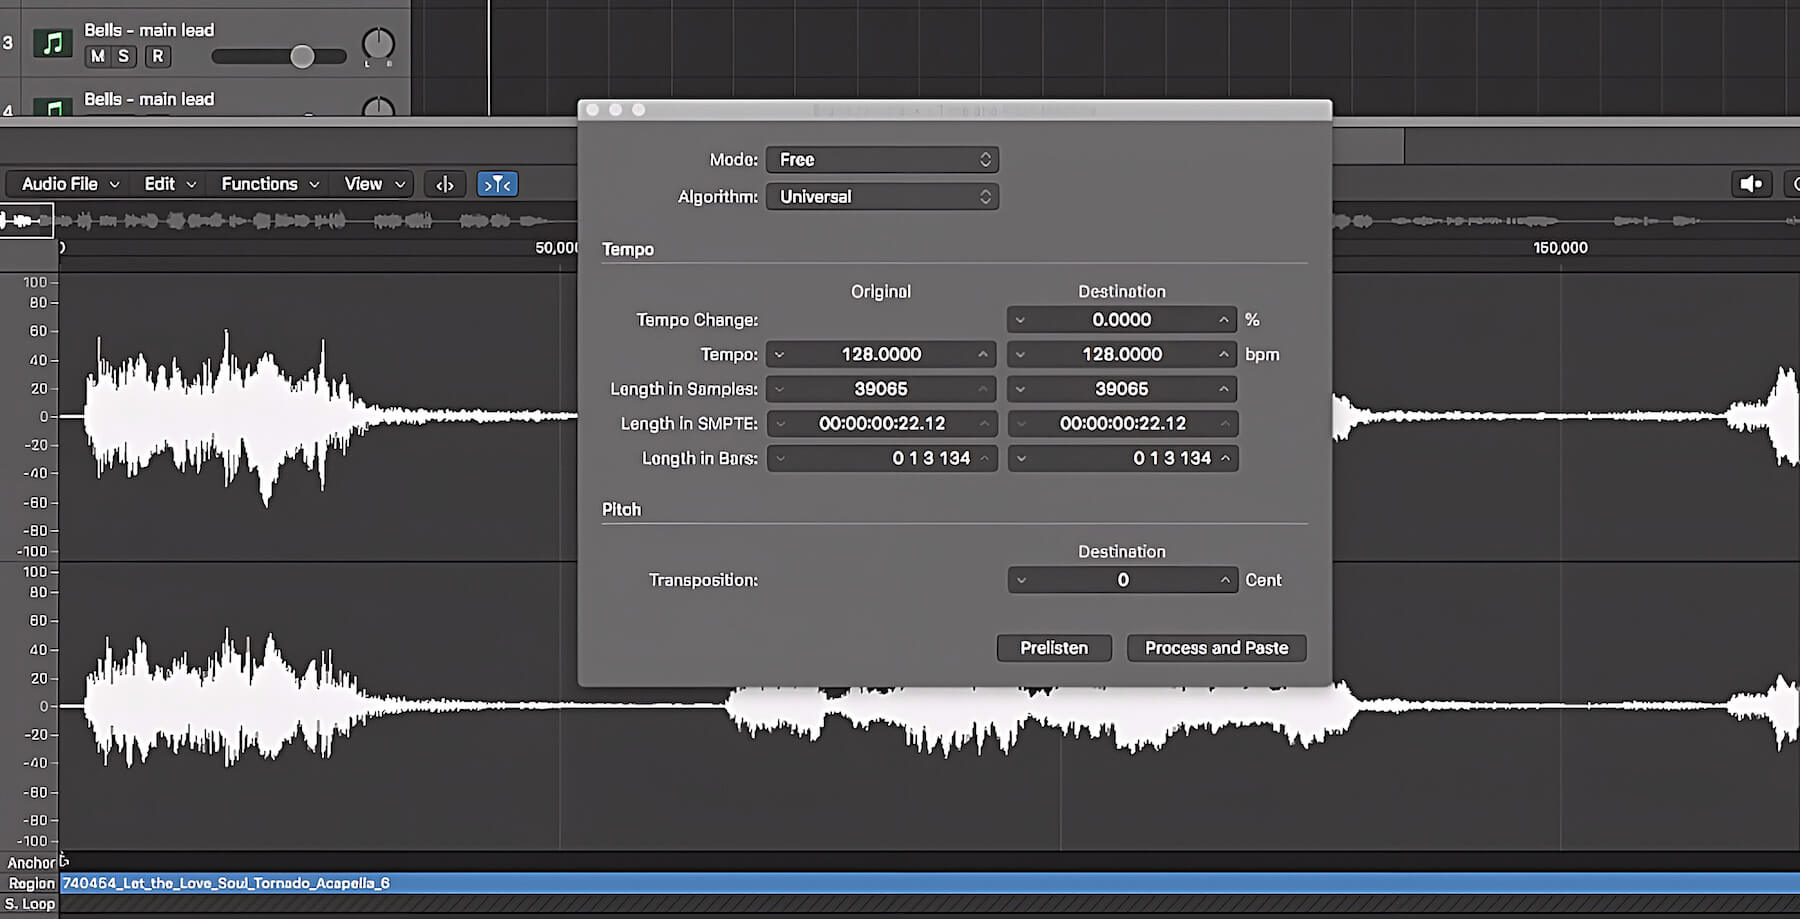
The Pitch section of this feature allows you to transpose samples in cents, meaning you can make subtle tuning adjustments. If you want to change the pitch of your sample in semitones, simply input a multiple of 100 into the Transposition box (downwards pitch adjustments require a minus symbol). You can use the Prelisten button to hear how it sounds, and when you’re happy click Process and Paste.
Tip: To use the Transposition function in Logic Pro’s Time and Pitch Machine, make sure that you’re in Free mode, not Classic, and that the destination tempo is set to 0% or the same tempo as the original.
Dive into Logic Pro
If you want to learn Logic Pro in more depth, check out our Making Music with Logic Pro series of courses. Whether you’re a beginner or an intermediate user of this amazing DAW, you’re sure to learn something new from master educator Jono Buchanan.
